
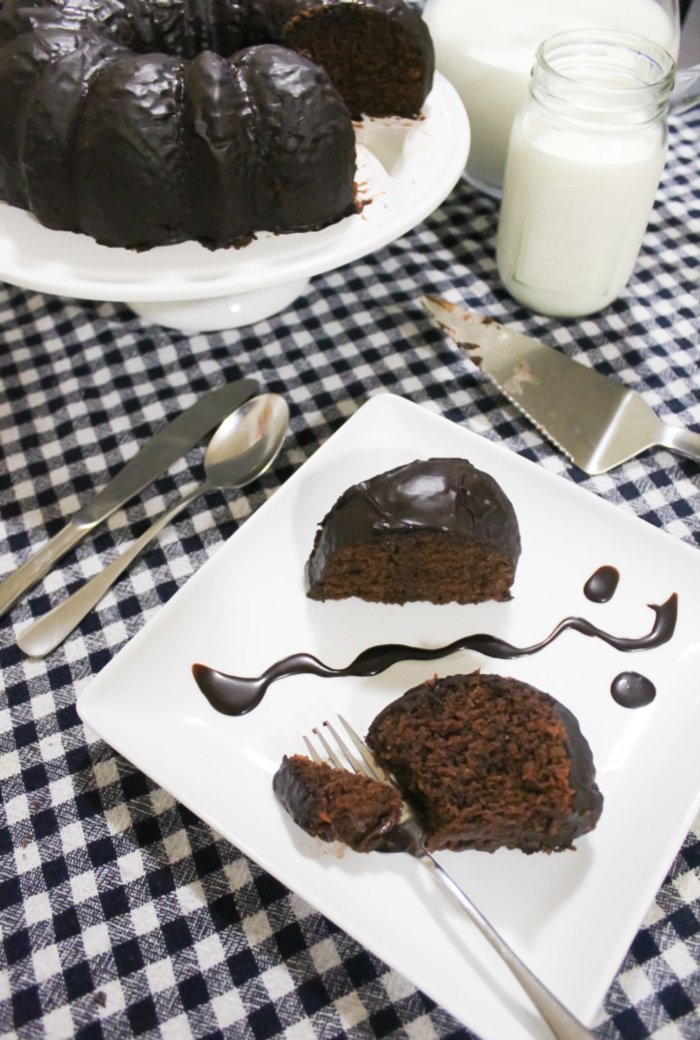
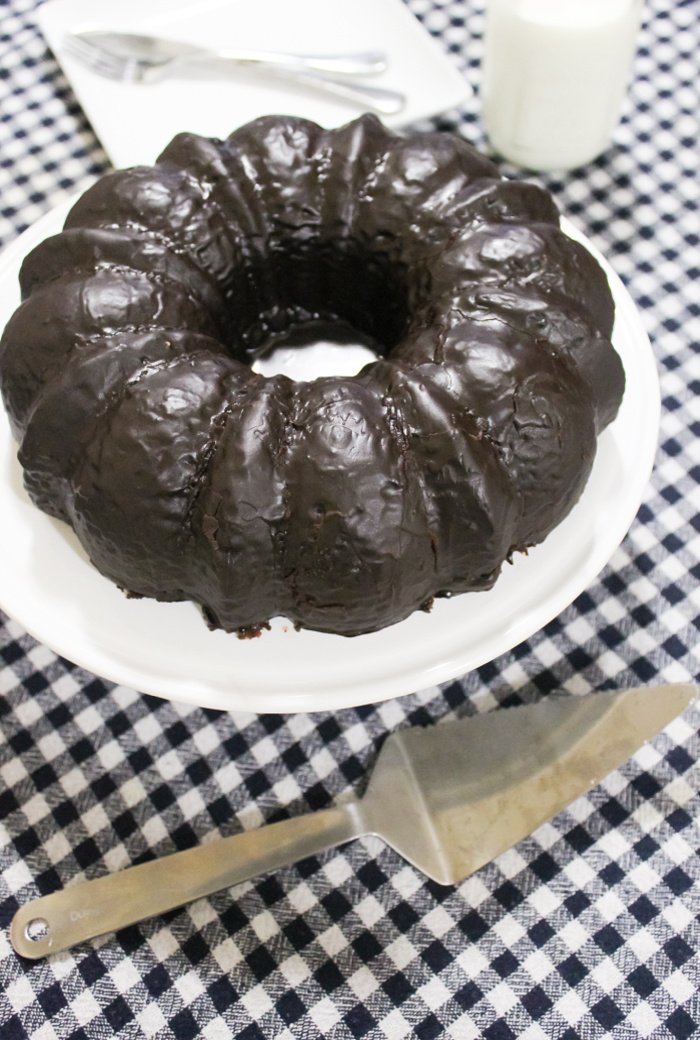
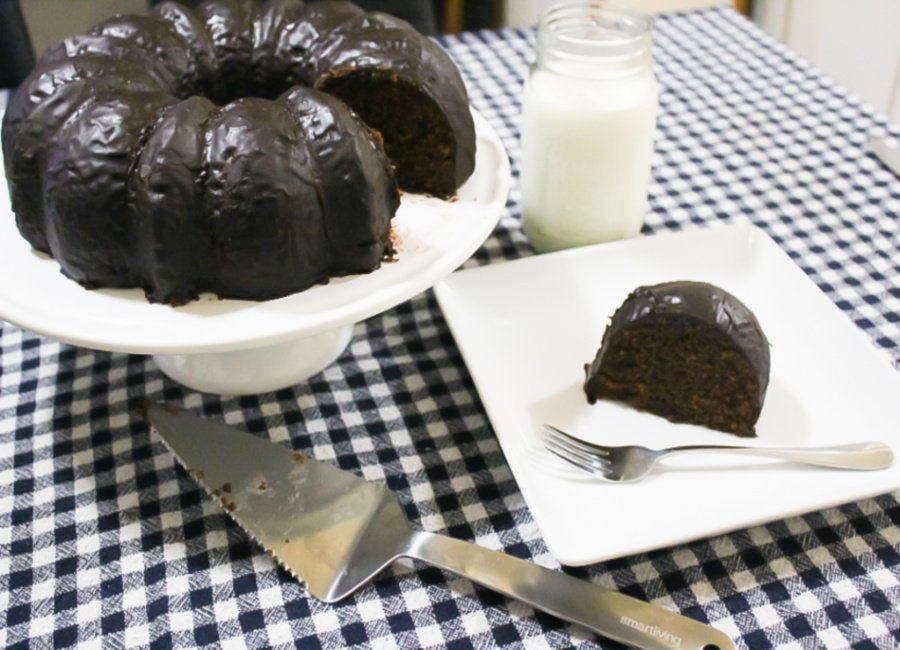
This is easily a top 5 chocolate bundt cake recipe made from scratch! It’s melt-in-your-mouth moist, with a delicious, finger-licking homemade chocolate frosting.
It may be your first time trying this, but it definitely won’t be your last. It oddly reminds me of my Easy Delicious Moist Chewy Chocolate Cookies Recipe. It’s a very easy recipe, folks, so you’ve got to give it a shot—you won’t regret it.
My Pop Inspired This Recipe
Chocolate cake brings back so many childhood memories for me, some good and some bittersweet. It makes me think of my father, who has transitioned.
He made the BEST chocolate cake EVER, and it was so incredibly moist! I’ve spent years trying to replicate his secret recipe, and I think I finally got it down pat.
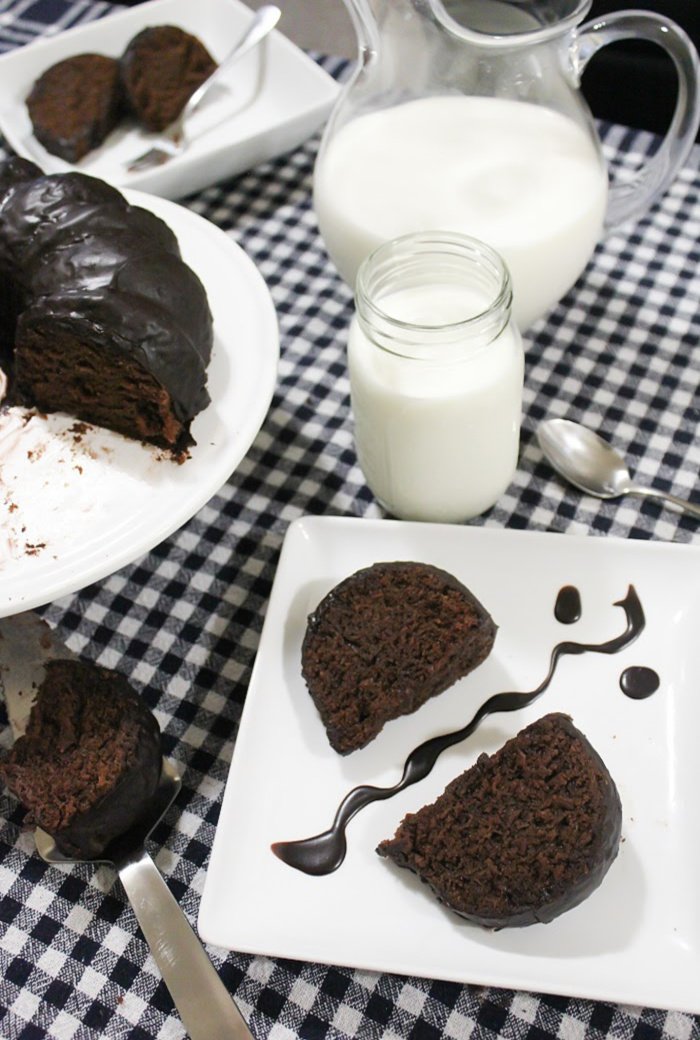
This delicious, moist chocolate cake literally melts in your mouth. It tastes so good with a cold cup of milk and makes the perfect dessert for family movie night. It’s also the perfect cake for a romantic dessert with your boo.
This chocolate cake recipe is top tier, and chocolate cake can’t get much better than this. I’ll put it up against anyone’s chocolate cake, and you would too. Lol!
Childhood Memories Of Dad’s Chocolate Cake
It’s been a while since I posted a dessert recipe, but I was in the mood for some chocolate cake and decided to attempt making my father’s famous moist chocolate cake.
And boy… was it just as good as I remember his cake being as a kid when he would make it back in the day. My mom was probably the biggest fan of my dad’s cake; she absolutely loved it as we all did.
Every time I make it, she says, “This reminds me of your father’s cake,” and she never forgets to remind me that, “It ALMOST TASTES AS GOOD AS HIS”!
It’s like… Mom, I get it; his is better. She cracks me up with her little backhanded compliment. Lol! But listen, I’ve tried FOR YEARS to make a recipe that tastes as close as possible to my pops’ chocolate cake.
I’m just glad that it’s finally about 75% as good—it was just half as good years ago. Lol! Now, after a few updates, I think this is about as close to my Pop Otis’s chocolate cake as it’s ever been.
I don’t know EXACTLY how he made it, but I know he didn’t follow the box instructions. As men, we were very competitive and always trying to outdo each other. Lol!
So I can see myself telling him, “At least my cake was made completely from SCRATCH!” Lol! Pops would make his cakes using boxes of Betty Crocker, Pillsbury, and Duncan Hines cake mix.
Then he would spice it up by adding additional ingredients. He never followed the instructions to a T. One thing I know he always did was boil hot water and add it to the cake mix.
He would also add buttermilk, melted butter, and more oil than what the box instructed.
I would always sit in the kitchen as he prepared the cake. I would watch him like a darn addict, waiting for him to blend the ingredients and add them to the cake pan.
I always enjoyed sticking my fingers in the bowl and scooping out the little bit of remaining cake mix left in it… I enjoyed that so much I would lick it clean! Hahaha!
That was probably my favorite part of my dad making cake: eating the leftover cake mix. My mom wouldn’t let me because she thought it would make me sick. Just a mom being a mom!
My dad, however, was the cool one, like most dads who let their kids get away with everything. So I was happy when he prepared cake without Mom being around to stop me from cleaning out the bowl. Lol
Remember Matilda’s chocolate cake?
Another ’90s childhood memory for me was watching Matilda. The scene that stands out was when Miss Trunchbull forced Bruce to eat a massive chocolate cake.
As nasty as he looked eating it, the cake itself looked pretty good. The frosting was so chocolately, and the cake was so moist it looked like chocolate pudding
I would always ask my father to make a chocolate cake every time I watched this movie. Lol! Most times he would oblige, and other times he’d say no. Lol!

Ingredients You’ll Need:
So here is the full list of ingredients. Make sure you have them all for best results.
Dry Ingredients
- Sugar: Sugar sweetens the cake and locks in moisture, which helps it stay soft after baking. Use a good brand like Domino’s.
- All-purpose flour: This is obviously the main ingredient for the cake—you can’t make it without flour!
- Cocoa powder: This gives the cake its rich chocolate flavor. We’ll be using Hershey’s Unsweetened Special Dark Cocoa Powder.
- Baking powder & soda: These are essential leavening agents that work together to help the cake rise.
- Salt: Salt enhances and strengthens every layer of flavor in the cake.
Wet Ingredients:
- Hot Water: The ultimate secret to getting an ultra-moist cake! It thins out the batter into a soupy consistency, which locks in moisture and keeps the cake moist
- Buttermilk: Buttermilk adds moisture and balances out the sweetness with its tangy acidity. Plus, it activates the baking soda to help the cake rise.
- Vegetable oil: The oil adds extra moisture and helps soften the cake while it’s cooking and long after it’s done.
- Butter: Butter adds rich, delicious flavor. Make sure you use unsalted butter and a quality brand like Land O’Lakes.
- Egg Yolks: The yolks are mainly for structure, richness, and moisture. We’ll be using large eggs and the yolks only.
- Vanilla extract: Vanilla flavor is so vital in sweets—the cake just won’t taste right without it. Make sure you use a good brand like McCormick.
Baking Pan Ingredients
- Pam cooking spray: This keeps the cake from sticking! You don’t want to put in all this work only for it to stick, and I haven’t found anything that works better than Pam spray.
- Vegetable Oil: Just a small amount to help prep the pan and prevent sticking.
- All-Purpose Flour: You’ll want to lightly dust the greased pan with a little flour.
Chocolate Frosting Ingredients:
- Confectioners’ sugar: We’ll be using powdered sugar to sweeten the frosting. Always use confectioners’ sugar—granulated sugar crystals will leave you with a crunchy frosting! Use a good brand like Domino’s.
- Cocoa powder: This gives the frosting its amazing chocolate flavor. I like to use Hershey’s Unsweetened Special Dark Cocoa Powder.
- Melted butter: The butter gives the frosting rich flavor and a silky texture and consistency.
- Whole Milk: Milk helps thin out the frosting to the right consistency.
- Vanilla extract: Super important—without the vanilla extract, the frosting will taste flat and bland.
Cooking Utensils You’ll Need:
For the best results and to make preparing the cake as easy as possible, make sure you have all your cookware and utensils on hand. We want this process to go as smoothly as possible!
- 2 large mixing bowls: You need two big bowls to combine and mix your ingredients.
- Strainer: You need this to properly sift your dry ingredients.
- Whisk: To thoroughly combine the dry ingredients.
- Hand mixer: To blend the wet and dry ingredients together and whip air into the batter.
- Spatula: I always use a spatula to scrape the bottom of the bowl and make sure everything is well blended. It ensures you get every last bit of batter out and into the pan.
- Bundt cake pan: Essential since we’re making a bundt cake!
- Brush: Needed to smooth out and brush the frosting onto the cake cleanly.
- Cooling Rack: To sit the cake on when it comes out of the oven. You’ll also use a big wide plate underneath for coating.
- Cake lifter: This is what you need to safely lift the cake from the plate onto its final destination, like a cake holder.
Hot Water: A Total Game-Changer for Moistness
Adding hot water to the batter might feel a little scary if you’ve never done it before. It’s the ultimate secret to getting an ultra-moist and tender cake.
When you pour that hot water in at the very end, it thins the mixture down into a pretty soupy consistency. Don’t panic—that is supposed to happen!
The hot water blooms the cocoa powder to give you a richer chocolate flavor. It also locks in all the moisture so your cake comes out decadent and moist instead of dry.
Cake Sticking to the Pan
We’ve all been through this before! Don’t beat yourself up if your cake doesn’t easily slide out of the pan. That’s what we all want, but sometimes things don’t go so smoothly.
This dilemma kind of reminds me of trying to peel a stubborn eggshell that just won’t come off cleanly. I was actually just faced with this problem the other day while testing this recipe.
I was busy on the phone yapping, got distracted, and forgot to prep the pan the right way. I must’ve subconsciously thought I was making cornbread or something. LMBBO!
This usually happens when you don’t add enough fat or flour, or your cooking spray has expired. If your cake won’t budge, DO NOT TRY TO SHAKE IT OUT—it’ll end up breaking apart.
First, take a butter knife and gently slide it around the edges. Do this to make sure the cake isn’t clinging to the sides of the pan.
Next, place a plate over the top, flip it upside down, and set a damp, warm towel over it. This steam trick helps to loosen the cake if it’s stuck to the bottom of the pan.
Give it about 30 minutes before trying to lift the pan off and gently tap the bottom to help the cake release. If it still doesn’t slide out, repeat the same steps using another damp, warm towel or rag.
If by chance a piece breaks off when it comes out, just patch it right back in place. No one will ever notice once you cover it with frosting! Haha! Trust me, it’s happened to me plenty of times before.


The Reason Frosting Isn’t Added At Once
Ok, so let me explain why I add the frosting in parts instead of all at once. I get asked about this all the time, and there’s a good reason for it!
What I like to do is use about a third of the frosting right after making it, while it’s still warm, loose, and runny. The reason I do this is to give the cake a protective layer of frosting.
Once this first thin layer sets and hardens, it creates a smooth surface. That way, when you add the remaining chilled stiff frosting, you’re brushing it over a solid base instead of bare cake.
If you skip that first loose layer, the thick frosting will catch the crumbs and tear up the cake—and we definitely don’t want that!
It’s all about building that initial sealed layer. This way the remaining frosting goes on smooth and clean without destroying your cake.
After that… you ARE ALL DONE!!! BAM!!! All you need now is a good movie and a big cold cup of milk, and you’re on ya way to heaven. LMBBO!


How To Make Otis’s Moist Chocolate Bundt Cake
Below, I’ll provide instructions and visuals for each step. First, we’ll be making the cake, then the frosting.
- Sift the dry ingredients as you add them to a big mixing bowl, then whisk well.

- Melt the butter in a skillet or microwave, then set it aside for a few minutes.
- After it cools down, add it to a large mixing bowl with the buttermilk, oil, and vanilla, then stir well.
- Separate the egg yolks from the egg whites.
- Add them to the wet mixture, and blend well with a hand mixer on low speed.

- Preheat the oven to 350°F.
- Place a small pot of water over high heat until it comes to a rolling boil.
- Meanwhile, add the wet ingredients to the dry ingredients.
- Blend well with a hand mixer on low speed just until everything is well incorporated.
- Once the water comes to a boil, scoop out a cup’s worth, add it to the cake mix, and blend well with the hand mixer on low speed.

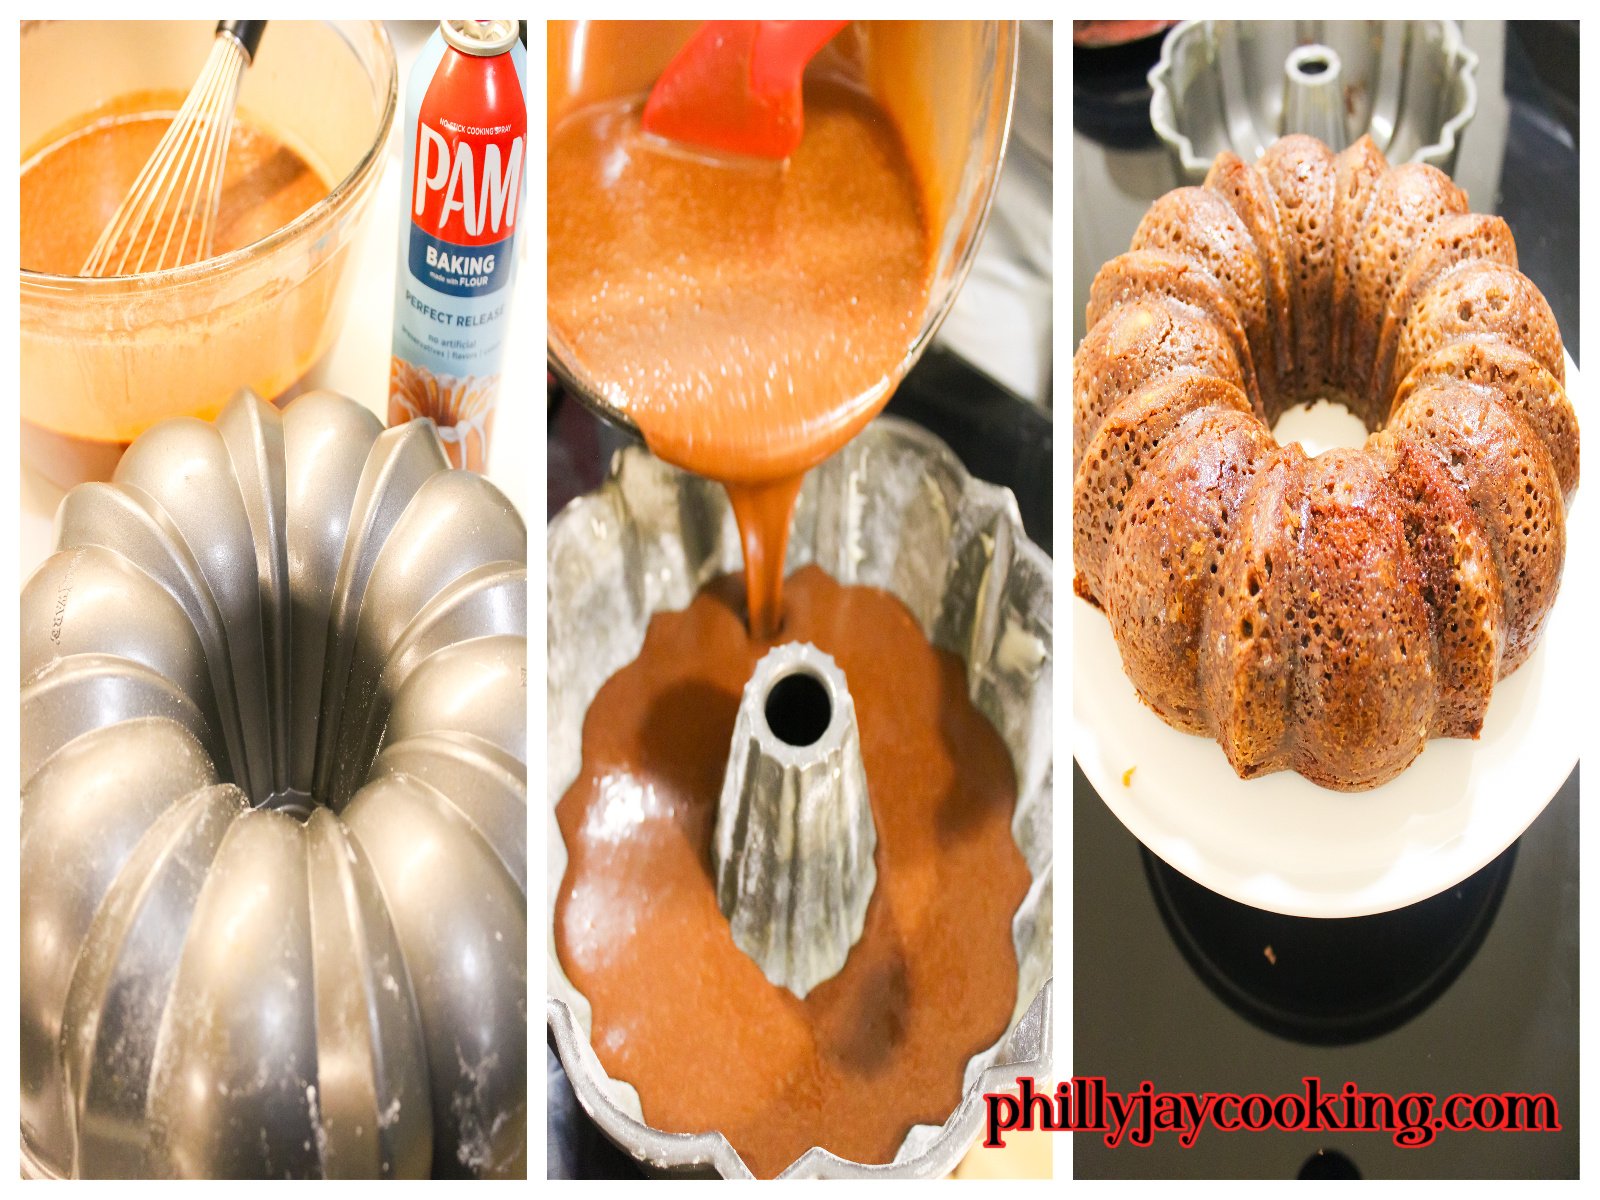
- Wipe some oil around all parts of the cake pan and lightly spray all parts with Pam spray.
- Add the flour, shake the pan to ensure all parts are well-coated, then flip it upside down to remove excess flour.
- Pour the cake mix into the cake pan.
- Lift the pan an inch above the table or counter and drop it; do this 3x.
- Place the pan on the lower rack in the oven.
- Bake for 1 hour, then remove it and set aside.
- FROSTING: Add all the frosting ingredients to a medium mixing bowl, then whisk until it’s nice and smooth.
- Place a baking rack over the cake pan, then flip it upside down to remove the cake.
- Place parchment paper under the baking rack to catch any dripping frosting.
- Pour 1/3rd of the frosting over the cake to ensure all parts are covered.
- Place the remaining frosting in the refrigerator to chill.
- Once the frosting on the cake settles and solidifies, gently brush the cake with 1/2 of the remaining frosting.
- Wait until it settles and hardens, then gently brush the cake with the remaining frosting.
- Lift the cake with a cake lifter, set it on a cake holder, and cover with a lid.
Baking Tips for success:
- Use fresh, high-quality ingredients: To optimize the deliciousness of your cake, use fresh ingredients rather than old ones that might be expired. Stick to good, trusted brands for a higher quality of taste.
- Bring ingredients to room temperature: Make sure everything is at room temperature before you start combining all the ingredients so they blend together smoothly.
- Measure your flour right: Don’t scoop flour straight from the bag with your measuring cup! That packs it down, which can easily cause you to use way more flour than the recipe calls for, leaving you with a heavy, dry cake. Instead, use a spoon to scoop the flour into your cup and level it off flat with a knife.
- Keep your mixer on low: Make sure that when you combine the wet and dry ingredients, your hand mixer is on low speed. This ensures that you don’t overwork the batter, which will ruin the texture of the cake.
- Don’t skip the spatula: A hand mixer won’t catch everything, and dry flour loves to hide right at the bottom of the bowl. Always grab a rubber spatula to scrape the sides and bottom so dry pockets of flour aren’t left behind and everything is well combined and blended in.
- Tap out the air bubbles: Once you’ve poured the batter into the pan, lift it an inch above the counter and drop it down three times. It sounds simple, but it forces out trapped air pockets, which causes holes throughout the cake.
Storage
- How to store a chocolate bundt cake? Place it on a cake holder, cover with a lid, and keep it at room temperature. This will ensure your cake stays nice and moist.
- Can you freeze this cake? Yes! Place it in a Ziploc bag and ensure it’s tightly sealed to prevent freezer burn. It will last up to 3 months in the freezer.
- How to defrost it? To defrost it, just unwrap it and let it stand at room temperature for 3-4 hours.
Frequently Asked Questions
- Can you add coffee or espresso to the chocolate cake batter? Yes, most definitely! A little bit of coffee or espresso powder is a great trick to deepen and enhance that rich chocolate flavor. If you opt to use coffee, just don’t overdo it, or the coffee taste will overpower that chocolate goodness.
- Can I use another type of cake pan to make a layered cake? Most definitely! Layered cakes are super popular here in the States. This recipe definitely makes enough batter for a 2-layer cake. Evenly split the batter into two parts and pour into two well-coated round cake pans.
- Why does my cake have a gummy texture or streaks? This usually happens when the cake is slightly underbaked or when you overmix the batter. Too much moisture can result in a gummy cake, as it prevents the flour from developing a drier, cake-like texture. When you overmix the batter, the gluten can become too strong and overdeveloped, also resulting in a tough, gummy texture. To prevent this, use the right liquid-to-flour ratio, and mix on low speed or with a big spoon just until everything is combined.
- Why was my cake wet or mushy on top? If the surface is still mushy and damp, it usually means it needs more time in the oven. The flour on top can’t cook into a proper dry crumb if it’s slightly underbaked or holding too much surface moisture. If this happens, don’t be afraid to pop the cake back in the oven for a few extra minutes. Also, make sure not to use too much liquid next time.
- Why do I see mushy patches of flour on my cake? This usually happens when you overgrease the pan with too much oil and cooking spray, leaving liquid puddles. This mixes with the flour to create a thick, wet layer that leaves mushy patches on the cake after baking. To prevent this, wipe away any excess oil or Pam spray with a paper towel. Then add a small amount of flour, toss and turn to fully coat the pan, and shake out any excess flour. The pan should be fully but lightly coated with flour before adding the batter.
- Why did my cake sink in the middle? There are a few common causes. Overmixing beats too much air into the batter, which weakens the structure. Opening the oven door too early lets a rush of cool air in. This causes a drop in temperature and shocks the batter, causing it to fall. Using expired baking powder or soda also loses its lifting power. To get the cake to rise tall, mix your ingredients just until incorporated, check your leavening dates, and keep the oven door shut!
- How to keep the cake moist? I keep my cakes on a cake holder, covered under a lid at room temperature. I don’t put my cake in the refrigerator at all; leaving it out keeps it nice and moist. You can even keep it sitting in the microwave; just make sure it’s covered!
Hope y’all enjoy this modified version of my father’s famous chocolate cake! Please leave a comment below and give me a good rating if you love it as much as I do.
Also, subscribe to my newsletter to receive email notifications every time I drop a new recipe.
Enjoy, later!
PBJ~
Otis’s Easy Moist Chocolate Bundt Cake Recipe (Made from scratch)
- Prep Time: 30 Mins
- Cook Time: 1 Hr
- Total Time: 1 Hr 30 Mins
- Yield: 10-12
- Category: Dessert
- Method: American
- Cuisine: N/A
Description
A super-moist, crowd-pleasing chocolate bundt cake recipe. Baked entirely from scratch and finished with a rich homemade frosting. It’s the ultimate treat for chocolate lovers and perfect for family movie nights.
Ingredients
DRY INGREDIENTS
- 2–1/2 Cups White Sugar
- 1–3/4 Cups All Purpose Flour
- 3/4 Cups Hershey’s Unsweetened Cocoa Powder
- 2 Tsp Baking Powder
- 1 Tsp Baking Soda
- 1 Tsp Salt
WET INGREDIENTS
- 1 Cup Hot Water
- 1 Cup Buttermilk
- 1/2 Cup Vegetable Oil
- 1/2 Cup Butter, melted
- 3 Egg Yolks
- 2 Tsp Vanilla
BAKING PAN
- Pam Non-Stick Baking Spray
- 2 Tbs All-Purpose Flour
- 2 Tsp Vegetable Oil
FROSTING
- 3–1/2 Cups Confectioner’s Sugar
- 1/2 Cup Hershey’s Special Dark Cocoa Powder
- 1/2 Cup Butter, melted
- 1/4 Cup Milk
- 2 Tsp Vanilla
Instructions
- Sift the dry ingredients as you add them to a big mixing bowl, then whisk well.
- Melt the butter in a skillet or microwave, then set it aside for a few minutes.
- After it cools down, add it to a large mixing bowl with the buttermilk, oil, and vanilla, then stir well.
- Separate the egg yolks from the egg whites.
- Add them to the wet mixture, and blend well with a hand mixer on low speed.
- Preheat the oven to 350°F.
- Place a small pot of water over high heat until it comes to a rolling boil.
- Meanwhile, add the wet ingredients to the dry ingredients.
- Blend well with a hand mixer on low speed just until everything is well incorporated.
- Once the water comes to a boil, scoop out a cup’s worth, add it to the cake mix, and blend well with the hand mixer on low speed.
- Wipe some oil around all parts of the cake pan and lightly spray all parts with Pam spray.
- Add the flour, shake the pan to ensure all parts are well-coated, then flip it upside down to remove excess flour.
- Pour the cake mix into the cake pan.
- Lift the pan an inch above the table or counter and drop it; do this 3x.
- Place the pan on the lower rack in the oven.
- Bake for 1 hour, then remove it and set aside.
- FROSTING: Add all the frosting ingredients to a medium mixing bowl, then whisk until it’s nice and smooth.
- Place a baking rack over the cake pan, then flip it upside down to remove the cake.
- Place parchment paper under the baking rack to catch any dripping frosting.
- Pour 1/3rd of the frosting over the cake to ensure all parts are covered.
- Place the remaining frosting in the refrigerator to chill.
- Once the frosting on the cake settles and solidifies, gently brush the cake with 1/2 of the remaining frosting.
- Wait until it settles and hardens, then gently brush the cake with the remaining frosting.
- Lift the cake with a cake lifter, set it on a cake holder, and cover with a lid.
Notes
- Room Temperature: Make sure you set out all of the ingredients so they’re at room temperature before combining everything.
- Don’t check it: Don’t keep opening the oven door to check on it while it’s baking. This can prevent the cake from fully rising or cause it to collapse.
- Storage: The best place to store a cake is on a cake holder, covered under a lid, at room temperature. Keeping it covered in a microwave another good option as well.



Jay,
I have been watching your videos for a few years and made several spectacular dishes using your recipes. You are one heck of a Chef, knowledgeable, professional and charismatic … But I notice recently the ingredients for your chocolate cake are no longer in the description box under your YouTube channel and the measurements/ ingredients differ from whats on YouTube video and whats on your website (this link). The original recipe was a master piece. I would greatly appreciate if you can send me the original chocolate cake recipe that was on your YouTube channel years ago. Just in time for Thanksgiving
Thanks
Warren
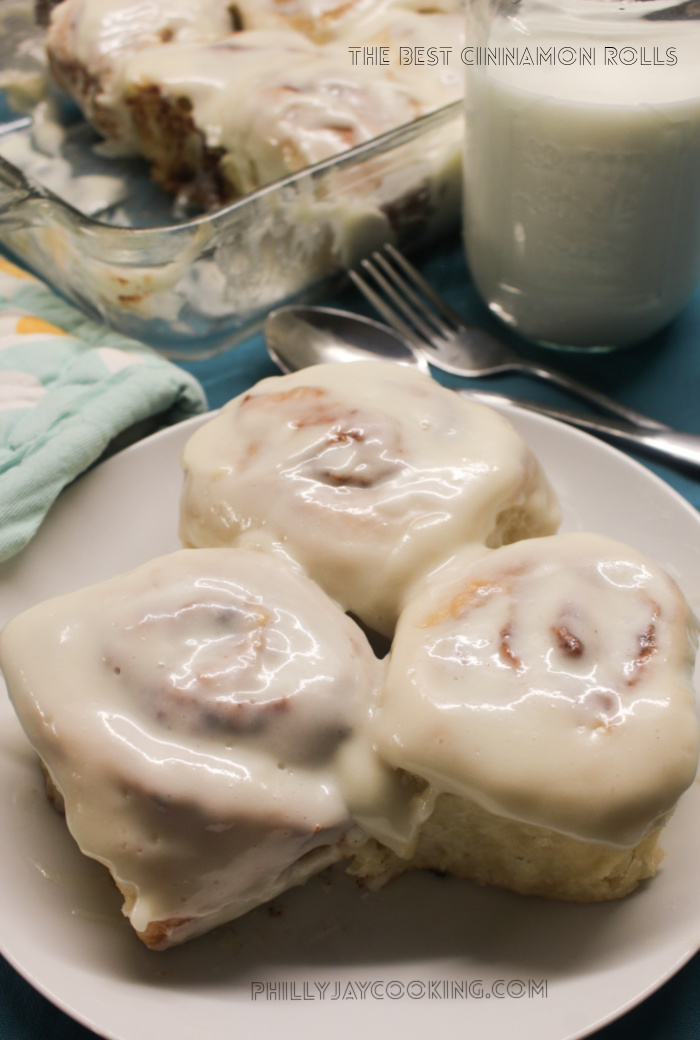
PLEASE post your cinnamon roll recipe on your website!!!!!
Ok, I will soon!!!