
Let me first start off by saying that I hate baking because everything has to be so accurate and precise – there is literally no room for error. Just “a little too much of this or not quite enough of that” can completely ruin a cake, pie, or cookie.
It’s a whole science, and if baking isn’t your thing, you will struggle to master these types of recipes. I finally nailed this chocolate cookie recipe, however, and something tells me y’all are gonna love these simple but delicious chocolate cookies.
Let me first start off by saying it took me some time to master this recipe and get the cookies to taste as good as they do. Trust me, this wasn’t an overnight process, nor was it one of those recipes I got right on the first try.
But all the experimenting and adjustments were worth it because these cookies are so freaking good, and this is coming from someone who isn’t a big fan of chocolate. I barely eat ANYTHING with chocolate in it…
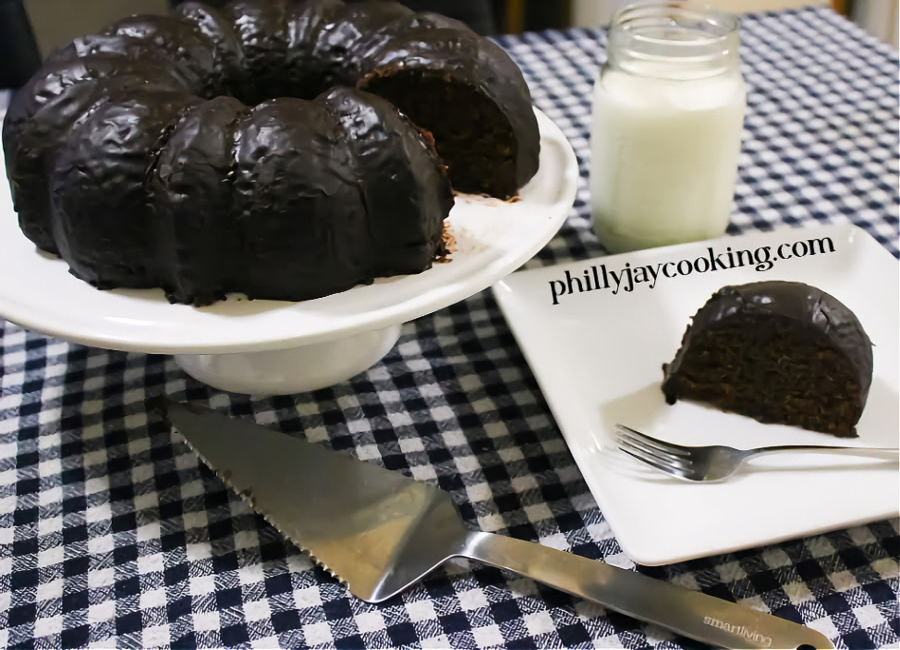
I don’t like chocolate ice cream, candy, or pudding. I will eat some chocolate cake, though, if it’s made right. By the way, if you’re looking for a FIYA chocolate cake recipe, give my Moist Chocolate Cake Recipe a shot!
Trust me, that’s a recipe you won’t regret trying. But yeah, overall, I’m just not a fan of chocolate, even though Im chocolate myself! LMBO! I’m sorry, but I wouldn’t be me if I didn’t throw that in there!
What makes this a good chocolate cookie recipe?
With all that being said, these are pretty darn good. They’re so good that even this chocolate hater couldn’t resist going back for more. So why exactly is it such a good recipe? Well…
- Moist and chewy: Don’t you hate those flat, hard, teeth-breaking hockey pucks they call cookies? Well, these are chewy on the inside with a crunchy exterior, just the way most of us love our cookies.
- The perfect flavor: Another thing that makes these cookies so good is the balance of flavor. They aren’t too sweet, nor are they bitter. I think one of the reasons folks don’t care for chocolate is because of how bitter it can be sometimes.
- The perfect snack for kids: Kids love sweet snacks, especially cookies, and they’ll love these because of how crunchy, sweet, and soft they are.
- Your kids can have fun making this: This is a kid-friendly recipe, not just because it’s something they would love but because it’s something easy they can help you make. And with the blending, and cookie cutting, kids will find this interesting and fun.
- Great snack for family movie night: It’s also the perfect late-night snack because they’re light on the stomach, so you can go to sleep right after. Lol!
Childhood memories of cookies
One thing I remember about cookies growing up is how my mom would bake them for my sister and I shortly after dinner before we’d watch 7 Heaven together on Monday nights.
Some nights we’d watch a movie together and eat ice cream and sometimes pie if she had any made. But cookies were the one thing my mom didn’t really attempt to make from scratch.
She’d buy the cookie dough by Pillsbury that you store in the freezer, and when it was time to make them, she’d just cut them and place them nicely on a baking sheet. I remember watching her do that and always begging her to have some before they were done.
I think because I wasn’t the biggest cookie fan and the fact that I saw cold air rising from them after she cut into them, they reminded me of ice cream, and I just wanted to bite into them.
Sometimes she’d give in and break off a little piece and give it to me. I don’t think she realized eating them cold wouldn’t have made me sick or anything. She was just a mother being cautious.
Boy Scout cookies
When I was in about 6th grade, age 11 or so… they would give us order forms to take home to our parents to sign to pre-order Boy Scout cookies they would sell during Easter and close to the end of the school year.
My mom and I loved the Caramel deLites!!! Those were her favorites and the ONLY kind I ate. I might try to find some by the way – writing about them has me in the mood for some.
Anyway, while everyone else loved cookies, I was a yogurt, pudding, and ice cream kind of kid. Those were the kind of sweets I loved most. And I couldn’t stand chocolate chip cookies for some odd reason. The only thing I liked about them was the chocolate chips.
I remember picking the chips out when my 6th-grade teacher would bring them in for us, and she’d get on me about wasting them and picking out the chips. Memories, memories, memories… now I’m an old man creating homemade cookie recipes.
Use good-quality ingredients
Before I get into the ingredients, it’s important that I emphasize using high-quality name-brand ingredients like butter, sugar, cocoa, and vanilla. You only need a few ingredients to bake cookies.
So you want those few ingredients to be rich in flavor and high in quality. So make sure you’re using pure vanilla extract, not imitation vanilla, and use a good brand of unsalted butter, sugar, and cocoa powder.
Ingredients you’ll need:
Dry Ingredients
- Flour: The flour is what the cookie is made out of so you definitely need flour! We’ll be using regular old all-purpose Flour.
- Cocoa Powder: Without the Cocoa Powder, you’ll have sugar cookies and not chocolate cookies. Lol! I like to use Hershey’s Unsweetened Cocoa Powder.
- Leaveners: Baking Powder is a leavening agent that helps cookies rise, and baking soda produces carbon dioxide when mixed with acidic ingredients like brown sugar and chocolate. It causes the cookies to rise. It also contributes to a chewy texture and crispy edges.
- Salt: Ok so the salt just enhances the overall flavor, and only a pinch of it is needed.
Wet and non-dry ingredients
- Sugar: We’ll be using brown sugar for sweetness and moisture. Use a good brand like Domino’s brown sugar. You can use dark brown sugar for a richer flavor. Since sugar doesn’t dissolve well, use part Confectioner’s sugar to achieve the desired sweetness without adding hard granulated sugar crystals you can feel when biting into the cookie.
- Egg: Eggs provide structure, they’re for leavening, and flavor, believe it or not. Use a large egg.
- Fat: Now I’m using unsalted butter by Land O Lakes, which, in my opinion, is a good, rich brand of butter. Make sure you’re using a good brand of unsalted butter as well. If salted butter is all you have on hand, reduce the amount of salt by half.
- Flavoring: Vanilla extract is one of the most important ingredients besides cocoa for flavor. What vanilla does for pie, cakes, pudding, and cookies can’t be understated. Use a good brand of vanilla like McCormick Vanilla extract.
Cookware & utensils you’ll need:
- Measuring cups: Get measuring cups to measure the ingredients so that you’re using an accurate amount.
- Knife: Use a knife to level off the ingredients so that you’re not going over the amount required.
- Strainer: The strainer is for sifting; scroll below to read more about it.
- Whisk: I like to use this tool to ensure all the dry ingredients are well incorporated when I combine everything.
- Large mixing bowl: I like to use a large mixing bowl to cream and combine my dry ingredients just to prevent everything from splashing everything. I hate making a mess.
- Hand mixer: A hand mixer is needed for creaming.
- Spatula: I use a spatula to scrape the ingredients that splash on the sides of the bowl down into the mixture so everything gets blended in.
- Rolling pin: Have a rolling pin on deck to flatten and roll out the cookie dough.
- Cookie cutters: Have a cookie cutter on hand to cut the cookies into nice, even circular shapes.
- Cookie Scooper: You can also use a cookie scooper instead of a cutter.
- Parchment paper: This prevents the bottom of the cookies from burning and sticking to the baking sheet.
- Baking Sheet: Have a baking sheet bake the cookies and the cooking rack that comes with it to rest the cookies on once they’re done.
The flour, cocoa, and baking powder
- Use new baking powder: Ensure the baking powder, a leavening ingredient responsible for the cookies’ rising, is no more than two months old. If your cookies didn’t rise, using outdated baking powder may be the reason why.
- Accurately measure the flour and cocoa: Scoop the flour and cocoa into measuring cups and level them off with a knife to ensure you’re not using more flour and cocoa than you should.
Sifting dry ingredients
People always ask if sifting dry ingredients are necessary. I don’t know if necessary is the word I’d use, but I would recommend it.
- Break up big clumps: Sifting flour and cocoa powder through a sieve or sifter breaks up clumps, which prevents you from using more than needed. The sifter will break the clumps down and make sure all of the flour and cocoa is being accounted for when measured.
- Remove debris of foreign pieces: If there are any foreign or hard pieces in any of the dry ingredients, sifting will definitely prevent them from getting into the mixture.
- A smooth mixture: Sifting also helps create a smoother mixture and therefore batter, resulting in a fluffy, lighter crumb.
- Aerating the flour: This is definitely good for flour that’s been sitting for a while and have become compacted. Aerating flour distributes air evenly throughout the flour, ensuring a consistent texture throughout the baked goods.

The importance of salt
Let me talk about the salt I use in the dry ingredients because I know some of you may be confused by the salt in the ingredients list. For you cooking novice out there wondering why I added salt to the dry ingredients, it’s simply to enhance the flavor of the cookies.
Salt is a flavor enhancer, so it’s frequently used in sweet/dessert recipes. Trust me, without the salt, these cookies won’t taste as good, so don’t omit it. I hope y’all are clear now on why I add salt to this recipe. LMBO!!
Why are my cookies spreading and flat?
One of the dilemmas people face when trying to make and perfect cookies from scratch is making cookies without them spreading and coming out flat and thin as a sheet of paper! Lol!
A flat cookie is probably one of the worst outcomes you can experience in baking – almost as bad as a sunken cake! And I’m sure if you’ve attempted to bake some from scratch, at some point in time, you’ve experienced this.
Well, below are the 3 most common sins when baking cookies and what causes the forbidden flat cookie. Read these causes thoroughly and make sure not to do them again.
- Melted butter: Cold butter keeps everything in place because it’s solid, whereas melted butter turns everything into a runny mess. It’s liquidy, which softens the flour to where it’s almost muddy, and therefore can’t rise.
- A very hot oven: If the oven is too hot, it will cause the butter in the cookie dough to MELT before the other ingredients, like the eggs and flour, which are responsible for the structure and rising of the cookie, get to do their job.
- Not enough flour: Flour is responsible for the structure of the cookies! If there isn’t enough flour, there’s nothing to absorb the butter and keep the structure of the cookie upright when the butter melts while baking.

Bake them ahead of time
After you remove them from the oven, sit them on a baking rack at room temperature for a few hours before devouring them! It’s probably best to make these cookies in the morning and then leave them covered and sitting out throughout the day.
They’ll be all ready for movie night after giving them time to harden. They not only taste better after giving them time to sit and all the ingredients time to marry, but they harden into the perfect crunchy, moist cookie as well.
How to make chewy chocolate cookies
- First, scoop the flour and cocoa into measuring cups, then level off the top with a knife for accurate measurements.
- Pour all the dry ingredients, including the baking powder, soda, and salt, into a big mixing bowl through the sifter as shown below.
- Whisk it all in to make sure all the ingredients are well incorporated.


- Cream the sugar and butter by blending them together until smooth.
- Add in the egg and vanilla, and then give it all another blend.

- Add the dry ingredients to the butter mixture and blend until crumbs form.
- Mend and bring the crumbs together with your hands to form a ball of cookie dough.

- After combining the dry and wet ingredients, wrap the cookie dough with plastic wrap.
- Place in the refrigerator for 30 minutes to give all the ingredients time to marry.
- Preheat the oven to 375°F and line the baking sheet with parchment paper.
- Get the cookie dough and slice it in half.
- Press down on it, then spread it out using the rolling pin, making sure the cookie dough is about 1/8 inch in height.
You can use a cookie scooper and scoop cookies from the ball of dough instead if you prefer too. - Take some cookie cutters and cut out the cookies, then place them on the lined baking sheet.
- Gather and ball up the remaining cookie dough and flatten it out again to make more cookies, as shown in the photo below.

- When you place the cookies in the oven, make sure you bake them on the top rack.
- Bake them for 10 minutes, and when they’re done, place them on the baking rack and remove the parchment paper from underneath.
Tips for best results:
- Make sure the butter is at room temperature: Set it out if it’s frozen before starting the recipe. You dont want to work with hard frozen or soft almost melted butter.
- Use a spatula when mixing: When you combine the butter and sugar, make sure you scrape the mixture down from the sides of the mixing bowl with a spatula and stir the bottom so that everything is well incorporated, because the hand mixer can’t get to everything.
- Do not bake cookies on the bottom rack: Again, make sure not to bake these cookies on the bottom rack in the oven because they will burn due to being so close to the fire.
- If the cookies don’t spread: If your cookies, for whatever reason, don’t spread to your liking, press down on them and shape them to your liking with a spoon when they’re soft straight out of the oven, then let them sit.
- Remove parchment paper immediately: Sit the cookies on a baking rack immediately once they’re done. Otherwise, the moisture will seep to the bottom of the cookies and they may become too soft and fall apart. The air that hits the cookies from underneath on a cooking rack prevents this.
Serving suggestions:
- Milk: Well, let’s get the obvious out of the way, MILK! Lmbo! Cookies and milk are another one of those classic food combos that we’ll always love and never get old. Milk and cookies are like milk and cereal; they are a perfect union.
- Vanilla ice cream: Cookies in vanilla ice cream are like cookies in milk. Sometimes I crunch the cookies up and put them in the ice cream for a bowl of cookies and cream lol. It’s a good combo, though!
Storage
- How to store them? I leave my cookies out in a cookie jar! You can place them in the refrigerator, though; it won’t hurt! I just don’t like to bite into chilled cookies.
- Can you freeze them? Yes, if you want to ensure they stay fresh for a long time. Just wrap them in a ziploc bag and make sure they’re tightly sealed.
- Can you freeze the cookie dough before baking the cookies? Of course!!! Just scoop or cut out cookies from the dough so when you’re ready to bake them you can do so without having to do any scooping or cutting. Afterwards, place them in a ziploc bag and make sure it’s tightly sealed to prevent freezer burn.
If you rather scoop or cut into the dough when you’re ready to bake them, you can simply wrap the cookie dough in plastic wrap and place it in a ziploc bag, then store it in the freezer.
Frequently Asked Questions
- How to get my cookies harder? If you want traditional, harder, crunchier cookies, just leave them in the oven to cook longer. Maybe for an additional 5 minutes.
- How long do they last? These cookies can stay fresh for a few days, maybe 4 to 5!
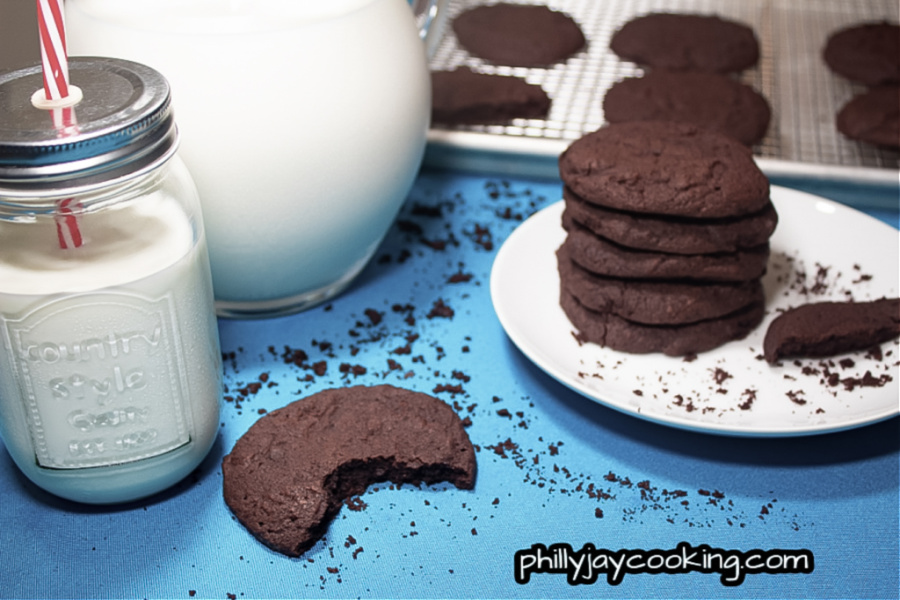
Chocolate cookies can’t get too much better than this folks! Chocolate haters may even enjoy these bad boyz for their moistness alone. So I hope you guys enjoy them…. they are AMAZING!
Check the recipe out below, and please share and comment; it helps a lot! Also make sure you subscribe to get notifications everytime I post a new recipe and follow me on social media, I dont bite! Im on Facebook, Pinterest, Twitter, Instagram, and YouTube.
Enjoy, later!
PBJ~

Easy Delicious Moist Chewy Chocolate Cookies Recipe
- Prep Time: 30 minutes
- Cook Time: 10 minutes
- Total Time: 40 minutes
- Yield: 10-12
- Category: Dessert
- Method: American
- Cuisine: American
Description
Sweet, delicious, easy to make, chocolate cookies recipe. Moist and chewy on the inside with a crunchy, crumbly exterior. Goes great with cold milk, making it the perfect late-night snack.
Ingredients
- 2–1/4 Cups All-Purpose Flour
- 3/4 Cup Hershey’s Unsweetened Cocoa Powder
- 1 Cup Unsalted Butter
- 1 Large Egg
- 1/2 Tsp Baking Powder
- 1/4 Tsp Baking Soda
- 2 Tsps Vanilla
- 1 Cup Confectioner’s Sugar
- 1/2 Cup Brown Sugar
- 1/2 Tsp Salt
Instructions
-
First, scoop the dry ingredients into measuring cups, then level off the top with a knife for accurate measurements.
-
Pour all the dry ingredients, including the baking powder, soda, and salt, into a big mixing bowl through the sifter as shown below.
-
Whisk it all in to make sure all the ingredients are well incorporated.
-
Cream the sugar and butter by blending them together until smooth.
-
Add in the egg and vanilla, and then give it all another blend.
-
Add the dry ingredients to the butter mixture and blend until crumbs form.
-
Mend and bring the crumbs together with your hands to form a ball of cookie dough.
-
After combining the dry and wet ingredients, wrap the cookie dough with plastic wrap.
-
Place in the refrigerator for 30 minutes to give all the ingredients time to marry.
-
Preheat the oven to 375°F and line the baking sheet with parchment paper.
-
Get the cookie dough and slice it in half.
-
Press down on it, then spread it out using the rolling pin, making sure the cookie dough is about 1/8 inch in height.
You can use a cookie scooper and scoop cookies from the ball of dough instead if you prefer too. -
Take some cookie cutters and cut out the cookies, then place them on the lined baking sheet.
-
Gather and ball up the remaining cookie dough and flatten it out again to make more cookies.
-
When you place the cookies in the oven, make sure you bake them on the top rack.
-
Bake them for 10 minutes, and when they’re done, place them on the baking rack and remove the parchment paper from underneath.


These are Awesome !!!!!
Even better with additions I adapted from a Cranberry Chip cookie Recipe… I ADD…
1.5 cups Chocolate Chips.. – I use Hersheys Special Dark
1.5 cups Dried Cranberries.. – Reg, or the Cherry soaked ones
3/4 Cup Chopped Pecans – I toast mine.. can also use Sliced Almonds toasted
I also use Hersheys Special Dark Cocoa in mine.. and sometimes sub almond extract for the vanilla…
That recipe you fold in Dried Cranberries, Chocolate Chips, and Chopped Pecans. but the batter is not dense so its easy
with this, I did it in the food processor in 2 separate batches… threw it all in and pulsed til combined