
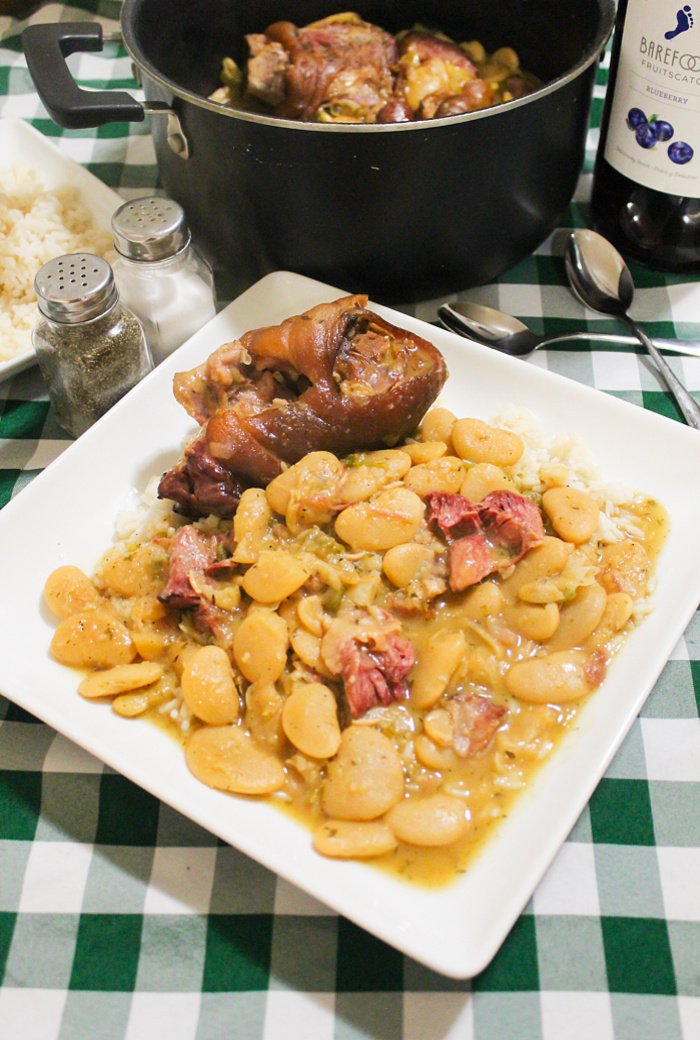
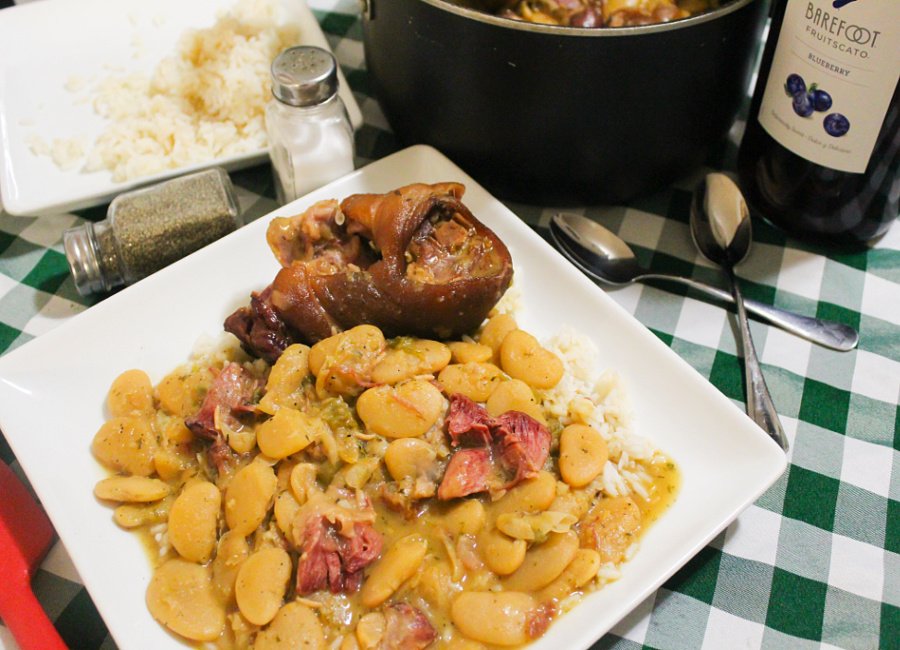
I’ve been craving lima beans and smoked ham hocks since sometime last week! Lol! It’s one of those dishes I love but don’t make often. But when I’m in the mood for beans, this is my go-to recipe.
This is comfort food at its finest and the perfect dinner for a brisk evening. So if you’re looking for a lima beans and smoked ham hocks recipe, this is the one.
These lima beans are so darn good, ya grandmom would even be impressed! So scroll down, print the recipe, and please give it a shot. You are going to love this dish! It’s one of my most-viewed YouTube videos for a reason!
What to love about this recipe:
- All-in-one meal: This dish has it all; your protein, veggies, and carbs combined into one recipe.
- One-Pot Cooking: You only need one pot to get the job done. That means fewer dishes to clean and more time to enjoy this delicious meal.
- Elder-friendly: Everything is very tender! The hocks fall off the bone, and the beans literally melt in your mouth. It’s a soothing, easy-to-eat meal old folks will love and appreciate.
- Ultimate comfort food: It’s hearty, filling, and guaranteed to warm you up. I love making this on a cold Sunday afternoon before the game. I remember eating this on a freezing-cold night, with a cup of tea on the side.
- Versatile serving: You can serve this as a side or main dish. Since it’s filled with protein and veggies, you don’t need to pair it with anything.
My first time trying lima beans and hocks
I remember the first time I had lima beans and smoked ham hocks. My Nana Alice Mae made it for dinner after we’d been out grocery shopping all day.
I remember it being a cold winter evening when I watched her cook this for us. The first thing I thought was, “This is some old folks’ food,” and I had no interest in eating it.
Unfortunately, I was sort of down on my luck at the time. I was 23 and struggling financially with nowhere to go. So I had to eat whatever Nana wanted to eat and decided to put on the table.
She was from Raleigh, North Carolina, so comfort food like this was her specialty! I knew it’d probably be good, but as a yungin, I wanted cheesesteak or wings.
But my tune changed real quick when I noticed how good they smelled as we sat down and talked in her kitchen. I went from just wanting to fill my stomach to being excited to try it for the first time.
It smelled so good that it had my stomach growling. I was already hungry, but the smell made me want to just dig into that pot and GO IN! Lol!
Long story short, it became a staple dinner for me in my new apartment. I loved it so much that I started making it at least once a month. Lol!
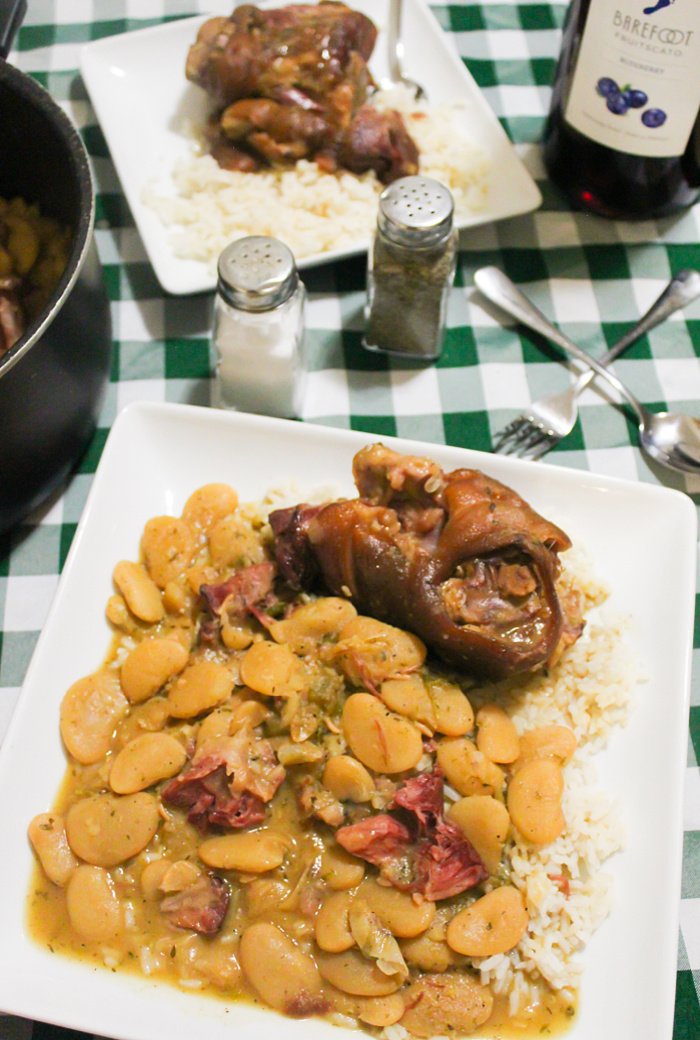
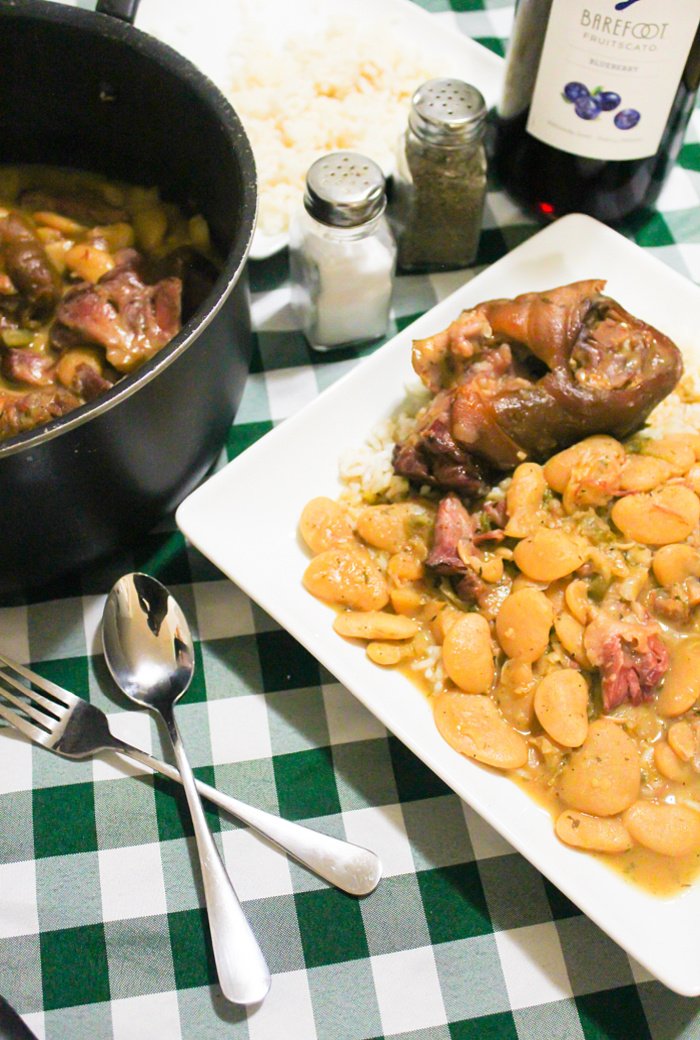
Those flavorful, soft beans, the natural creamy gravy, and tender meaty hocks had me hooked. I was officially addicted for the first few years after trying it for the first time.
When I knew I nailed this recipe
I’ve cooked this many times over the years. With that being said, experimenting and making changes was inevitable. I cook it the same way Nana did; I just tweaked it and made it my own.
I remember cooking this one night when my mom came through to pick me up. We were going to do some clothes shopping, and she came over right before it was done.
I remember her calling me to say she had arrived and rushing me to come outside. “Come on, Jay! We’ve got to hurry! The store closes in an hour!”
I was hungry, so I wasn’t going to wait to get back to eat. So I brought a bowl out to the car with me, and she asked me if she could taste a little.
Tell me why a few spoonfuls turned into her damn near eating it all to herself? LMBO! Then she had the nerve to ask me to go back inside and bring her out a bowl.
Miss Lady, who was in a rush, suddenly found the time to sit and eat. She tore those lima beans and smoked ham hocks up!
I didn’t mind, though, because I love seeing people enjoy my food. She more than enjoyed it; you could tell by all the smacking she did! That’s when I knew I’d made it the right way and had to share it with you all.
Modifications to the original recipe
Eventually, I recorded a video and shared it with my followers on YouTube. The video below will help my visual learners. Let me address some of the changes I’ve made since then, though.
The two changes I made that created a far more delicious dish: I sauté the vegetables now before adding the beans and hocks to the pot. I also remove the water I pre-boiled the hocks in, then cook them in broth.
Now that you know what I do differently, here is my classic YouTube video on how to make lima beans and smoked ham hocks.
Watch Me Make It
Ingredients you’ll need:
- Beans: Get a 15oz bag of large Lima Beans. The Goya brand is the gold standard.
- Meat: Make sure you pick up some SMOKED ham hocks. If you can’t find any or prefer not to eat pork, you can replace them with turkey tails or smoked turkey legs/wings.
- Vegetable add-ins: Yellow Onions, Green peppers, Celery, and minced garlic.
- Seasonings: Celery salt, Paprika, Chicken flavor bouillon, Garlic Powder, Onion Powder, Thyme, Black Pepper, Parsley flakes, and Sugar. This combination of seasonings was MADE for lima beans.
- Liquids: Water and chicken broth. Vegetable broth can be used as an alternative. Try to go for a low-sodium broth.
- Fat: Use unsalted Butter.
Everything You Need to Know About Beans
Handling Your Beans: Removing Splits
Should you remove the split beans? That is a common question. My grandma always removed the hard split beans. It’s okay if they open a little while soaking, but if they were already split, remove them and discard them.
The common belief is that doing this can prevent illness from potential contamination, since the beans could’ve been contaminated after splitting. So, to be on the safe side, the consensus is to just remove them.
If you happen to find a bag where a quarter to almost half of them are split, just get rid of them and buy a new bag. Typically, there are 5-10 split beans in a bag, so don’t feel like you’re losing much by getting rid of them.
Everything You Need to Know About Soaking
You guys hit me up with questions about soaking beans all the time, so I’m going to set the record straight. Let’s talk about why we soak, if it’s actually required, and some benefits to soaking the beans.
- Why soak? (The Benefits):
- Preventing gas: This is the #1 reason most people soak their beans. Beans contain complex sugars our bodies struggle to break down. That is what causes gas! So soak them overnight and give them a nice rinse. That will release the gas-causing sugars, making the beans easier on your stomach.
- Removing anti-nutrients: Soaking helps extract “anti-nutrients,” compounds in legumes that can interfere with nutrient absorption or irritate our digestive system.
- Safety first: Rinse the beans after soaking them. This removes any impurities, leaving the beans nice and clean.
- Does it actually shorten cooking time? Yes. Soaking hydrates the beans and allows them to break down complex starches. This allows them to absorb water more evenly, so they soften much faster once you start boiling them.
- How long should you soak? I recommend soaking for 4 to 12 hours. Some recipes suggest 24 hours, but I’ve found that can ruin the texture and leave your beans flavorless.
- Is soaking a must? Not necessarily. You can cook beans without soaking them, but be prepared for a significantly longer cook time. If you do skip the soak, make sure you have plenty of free time and plenty of broth.
- Pro-Tip: The “Old Bean” Factor: If you soaked your beans and they still took forever to cook, the beans were probably old. You never know how long those beans you bought from the store have been sitting on the shelf. So it doesn’t matter how long you soak the beans; they’ll take longer to get tender and creamy if they’re old and dry.
Bean Size & The Secret to Creamy Gravy
- Bean size: It’s all about preference. Some people like them big, some folk like them small. As long as you’re using 16 ounces, which is what the recipe calls for, you’re good.
- Green (Baby) Limas: Green lima beans are the same as their larger, pale counterparts. They’re harvested before they ripen, so they’re young and less mature, which makes them smaller. They’re more tender, cook much faster, and have a sweeter taste.
- Large (Butter) Beans: These lima beans are the older version of green baby limas. They aren’t as sweet and have more of a “bean” flavor. They take longer to cook and get tender.
- Bean Gravy: Beans become creamy the more you stir them, so cornstarch and flour aren’t needed. The gravy in lima beans that we all love occurs naturally. As you stir them, starch is released, resulting in a thick, creamy, gravy-like consistency.
How to prep smoked ham hocks
Ok, so now let me get into how I prepare my smoked hocks. I’m going to start by getting into how I clean them; yes, I’m part of the “Clean Yo Meats” club. That’s just how I was raised, to always clean your meats.
- Remove any hair: If there is any hair on the hocks, remove it with scissors. You shouldn’t experience this, but butchers are tacky sometimes. Occasionally, you’ll find some long strands on your hocks.
- Soak: Secondly, I let them soak in salt water for a few minutes. Other cleaning agents you can use are lemon or lime juice, vinegar, or baking soda. I let them soak for about 20-25 minutes. I use 1 tbs of either cleaning agent per 1 quart of water.
- Scrub and rinse: Lastly, scrub them with your hands, then rinse them really well before adding them to a pot of cool water.
Boil the smoked ham hocks
Boiling them is the second step in the prepping process. Here’s why I boil the ham hocks before adding them to the beans.
- Remove impurities: I boil the ham hocks first for an hour to extract any impurities, just like I do with pork neck bones. Remove the dark foam that rises to the surface as the ham hocks boil.
- Gets them tender: Boiling is also necessary so they are almost done by the time you add them to the beans. It takes hocks a long time to get tender. Boiling them gives them a head start so they’re tender by the time the beans are done.
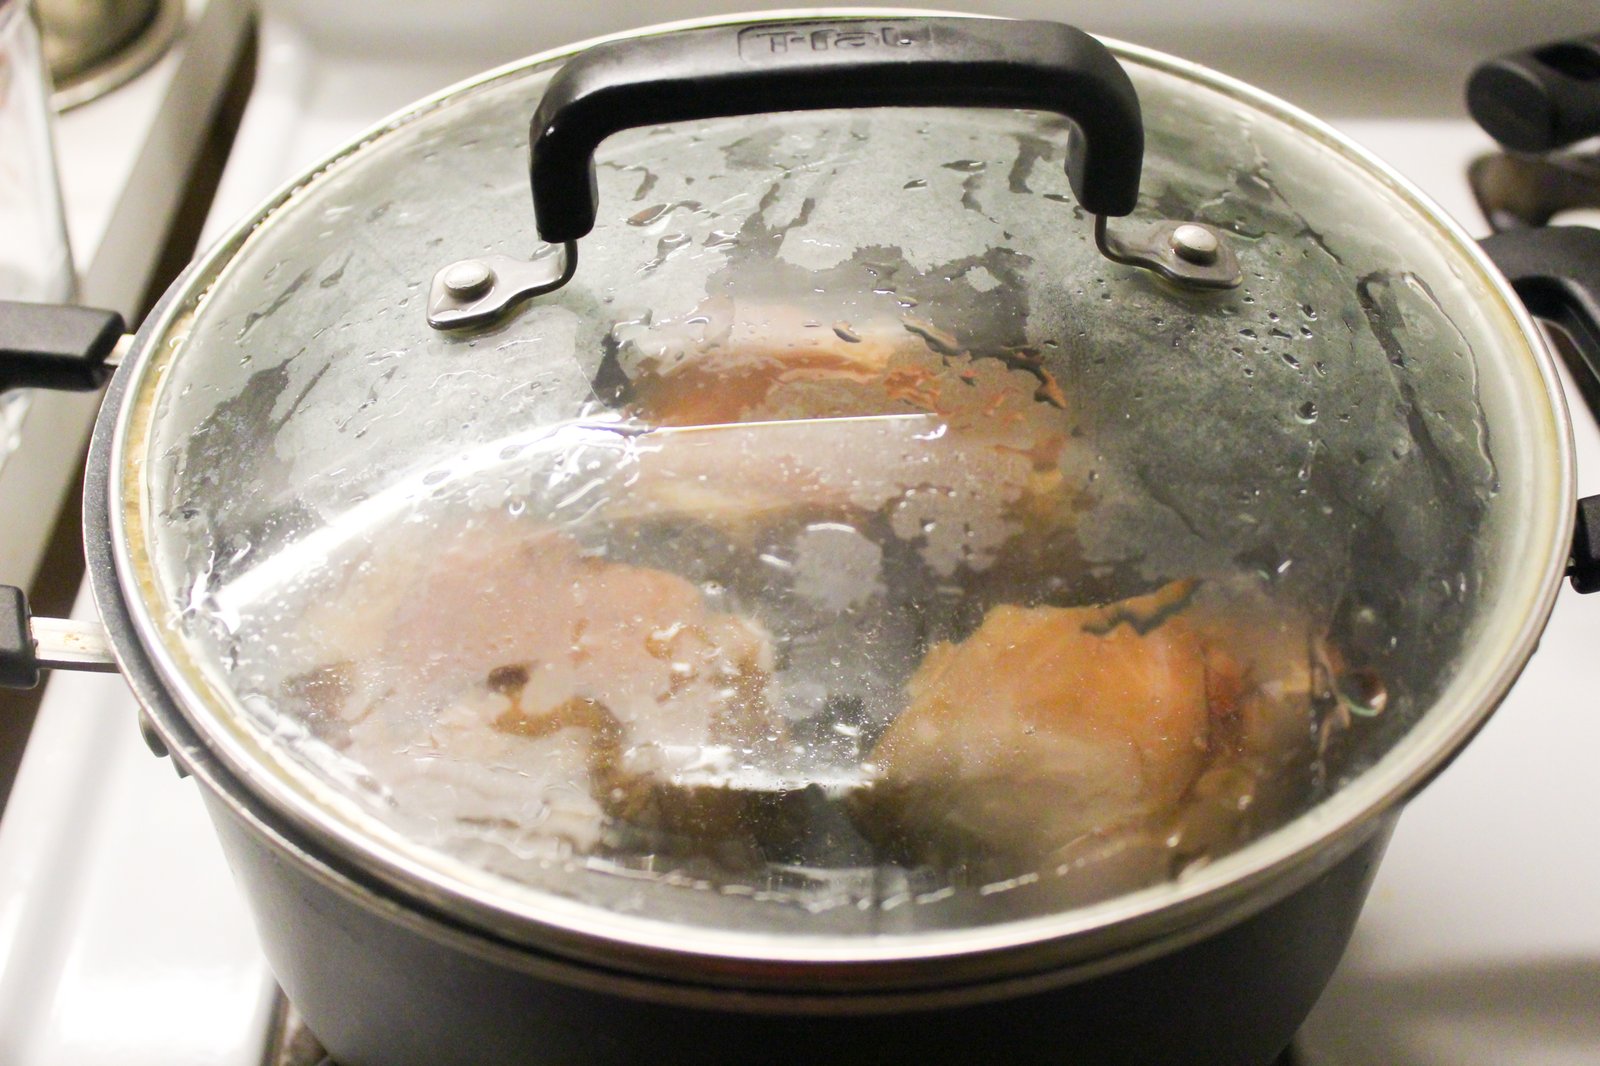
- Cover with a lid: To ensure they get nice and tender, cover them and leave a small crack on one side. Do this to ensure the water doesn’t bubble and overflow.
How to make lima beans and smoked ham hocks
- Remove the split beans and discard them.

- Place the beans in a large bowl and cover them with cool water.
- Refrigerate and let them soak for 12 to 24 hours.

- Place a large pot over medium heat.
- Add the hocks and 3 qts of water.
- Cover with a lid, leaving a crack on the side, and boil for 2 hours.
- Meanwhile, chop up the vegetables.
- After 2 hours, remove the hocks.
- Rinse them well and set aside.
- Clean out the pot.
- Place it over medium-high heat.
- Add in the butter, chopped vegetables, and minced garlic.
- Sauté for 3-4 minutes.

- Reduce the heat to medium.
- Add the beans, hocks, bouillon cube, and seasonings.
- Pour in the 2 quarts of broth and stir until well combined.

- Cover with a lid, leaving a crack on the side.
- Simmer for 2-1/2 to 3 hours, stirring periodically.

Tips for best results:
- Don’t use the ham hock water: Never use the water you boiled the hocks in to cook your beans. That water is full of the impurities you just spent time removing. Using it will leave your beans with a foul taste.
- Rinse and clean: Once the hocks are done boiling, rinse them well under fresh water. Scrub the pot thoroughly to remove any residue before you start sautéing your vegetables.
- The “don’t touch” rule: Don’t stir the beans too much during the first hour. Let them do their thing. Only start stirring frequently once the liquid begins to thicken.
- Stir periodically: Stir the beans every 20 minutes. Pay close attention during the last 30 minutes of cooking, though. Switch to stirring every 7 to 10 minutes then, because that’s when they tend to stick.
- Don’t add cold liquid: If your liquid gets low, only add hot broth or water. Adding cold liquid to a hot pot will mess with the temperature and ruin the texture.
- Keep the lid on: Keep the pot covered to maintain steady heat and even cooking. Just remember to leave a small crack on the side so the water doesn’t overflow.
Serving Suggestions:
- Rice: Nothing goes better with this than a hot bed of white rice. I keep it simple and use Success 10-minute rice. It’s truly a match made in heaven.
- World’s BEST Moist Southern Cornbread Recipe: If you want to go old school, you have to eat this with a slice of cornbread on the side. I make my cornbread slightly sweet, and that sweet-and-savory combo is unmatched.
- Fried chicken: Fried chicken tastes great with this dish. I usually eat the beans by themselves because there’s already plenty of meat in them. If I’m going to add another side, it’s going to be some crispy fried chicken though.
- Soul-Food Style Frozen Collard Greens: Collard greens pair perfectly with lima beans and smoked ham hocks. That’s all I’m going to say. Lol!
Storage and reheating
- How to store lima beans and smoked ham hocks: Simply place the beans in a container, like a glass Tupperware bowl. Cover it with a lid, plastic wrap, or aluminum foil, and refrigerate.
- Can you freeze this dish? Yes, beans freeze perfectly. Store them in a container or a Ziploc bag. Just make sure it’s tightly sealed to prevent freezer burn. They will stay fresh in the freezer for 3-4 months.
- How to reheat lima beans and smoked ham hocks: I wouldn’t use the microwave, as it can dry out the beans. Instead, add them to a pot with a little water if needed. Cover with a lid and reheat over low heat, stirring periodically until hot.
Frequently Asked Questions
- Can I use baby limas instead? Yes, but because they are younger and more tender, you will have to adjust the cooking time. Use a little less broth, too, since they won’t take as long to cook.
- Why aren’t my beans tender after a soak and 3 hours of cooking? It usually comes down to the quality or age of your beans. If they’ve been sitting on the shelf for a while, they’ll be older and tougher. They will take much longer to soften, no matter how long you soak them.
- Do I have to soak the beans overnight? It’s highly recommended. Soaking them helps them cook more evenly and improves texture. If you’re in a rush, try a “quick soak” by bringing them to a boil and letting them sit off the heat for an hour. The overnight method is always best, in my opinion.
- My gravy is too thin—how do I thicken it? If the liquid is too thin toward the end, don’t reach for flour. Just take a small scoop of the beans and mash them against the side of the pot. Then, stir those mashed beans back into the mix. The natural starch will thicken up the liquid.
Cookware & utensils you’ll need:
- Large Pot: Make sure you have a large pot for cooking the beans and hocks.
- Knife: Use a sharp knife to chop up your vegetables.
- Large Mixing Bowl: You’ll need this to soak your beans.
- Big Spoon: A sturdy big spoon is essential for stirring and serving.
- Measuring Cups: Use these to get your broth measurements just right.
- Measuring Spoons: You’ll need these to measure out your seasonings accurately.
Alright, that’s it for today! I know y’all are going to enjoy these beans, especially if you’re into real Southern comfort food.
If you make this for your folks, they’ll be pleased. Like, share, comment, and subscribe so you get notified every time I drop a new post.
Enjoy, later!
PBJ~
Print
Alice Mae’s Southern Lima Beans and Smoked Ham Hocks Recipe
- Prep Time: 2 hrs
- Cook Time: 3 hrs
- Total Time: 5 hrs
- Yield: 6
- Category: Sides
- Method: Soul Food
- Cuisine: Soul Food
Description
Experience true Southern comfort with these slow-cooked lima beans and smoked ham hocks. They’re perfectly tender, packed with flavor, and swimming in a rich, creamy gravy.
Ingredients
- 16oz Large Lima Beans
- 3 Smoked Ham Hocks
- 3/4 Cup Onions, coarsely chopped
- 1/2 Cup Green Peppers, finely chopped
- 1/4 Cup Celery, finely chopped
- 2 Tsps Minced Garlic
- 3 Tbs Butter
- 3 Qts Water (for hocks)
- 3 Qts Chicken broth
- 1 Tbs Sugar
- 1 Chicken Flavor Bouillon Cube
- 2 Tsp Parsley flakes
- 1–1/2 Tsp Celery Salt
- 1 Tsp Garlic Powder
- 1 Tsp Paprika
- 1 Tsp Thyme
- 1/2 Tsp Onion Powder
- 1/2 Tsp Black Pepper
Instructions
- Remove the split beans and discard them.
- Place the beans in a large bowl and cover them with cool water.
- Refrigerate and let them soak for 12 to 24 hours.
- Place a large pot over medium heat.
- Add the hocks and 3 qts of water.
- Cover with a lid, leaving a crack on the side, and boil for 2 hours.
- Meanwhile, chop up the vegetables.
- After 2 hours, remove the hocks.
- Rinse them well, and set aside.
- Clean out the pot.
- Place it over medium-high heat.
- Add in the butter, chopped vegetables, and minced garlic.
- Sauté for 3-4 minutes.
- Reduce the heat to medium.
- Add the beans, hocks, bouillon cube, and seasonings.
- Pour in the 2 quarts of broth and stir until well combined.
- Cover with a lid, leaving a crack on the side.
- Simmer for 2-1/2 to 3 hours, stirring periodically.
Notes
- Cook until tender: If they aren’t tender after 2-1/2 to 3 hours, add a little more broth and continue cooking. Continue this process until they’re tender.
- Make it ahead: These beans actually taste even better the next day! The flavors have more time to meld together, making them perfect for leftovers.













This is a hit everytime I make it. My dad lives in Florida during the winter and called me so I can send him the recipe. Perfectly seasoned, & perfect with some cornbread.
Where is the Recipe for the infamous Black eyed peas? Absolutely delicious
I will be doing a new video for that and posting that recipe on my blog here very soon, probably around december.
I can’t believe how this recipe leads me to believe I’m this great chef. The flavor, aroma is unbelievable. I used turkey necks since I no longer eat pork. Even with the different meat, the meat was still delicious.
Haha! Glad you enjoyed it Ty:) Keep cooking.
Rubbing it in at the end was not necessary!😂 Can’t wait until this weekend to make a pot. I grew up on this, just looking around at other people’s recipes – looks delicious!!! Just one thing – where is the cornbread? I’m one of the old people, rather do without the rice and have cornbread.
Now red beans and rice is a whole other story!
Enjoyed watching your video…😊