
I uploaded a turkey necks video to my YouTube channel years ago, around 2016 or so, and it went viral. Back then, as I said many times before, I didn’t use any measurements.
I didn’t use measurements because my channel catered to people who already knew how to cook and just wanted to make things a different way etc. But once I created a website, I began creating recipes.
Recipes are important because the food comes out pretty much the same all the time. Well, my turkey necks didn’t because, again, I didn’t have actual measurements or cooking time.
So after many years, I finally decided to make a recipe out of it for you guys. I know you’ve been waiting for a long time, and this recipe is way overdue, but here it is. And I’m excited to see how much you guys like it.
A Southern classic
I’m sure most of you who follow my blog remember me talking about McCloud many times here on my blog; he’s my maternal grandmother’s husband from the South who loved to cook dinner for breakfast. Lol! Ring a bell?
And that’s a fact; he’d eat leftover pork chops and collard green for breakfast. Lol! He was a great cook, and in previous recipes, I shared with you all how he, along with Alice Mae and Gwen, had a major influence on my cooking.
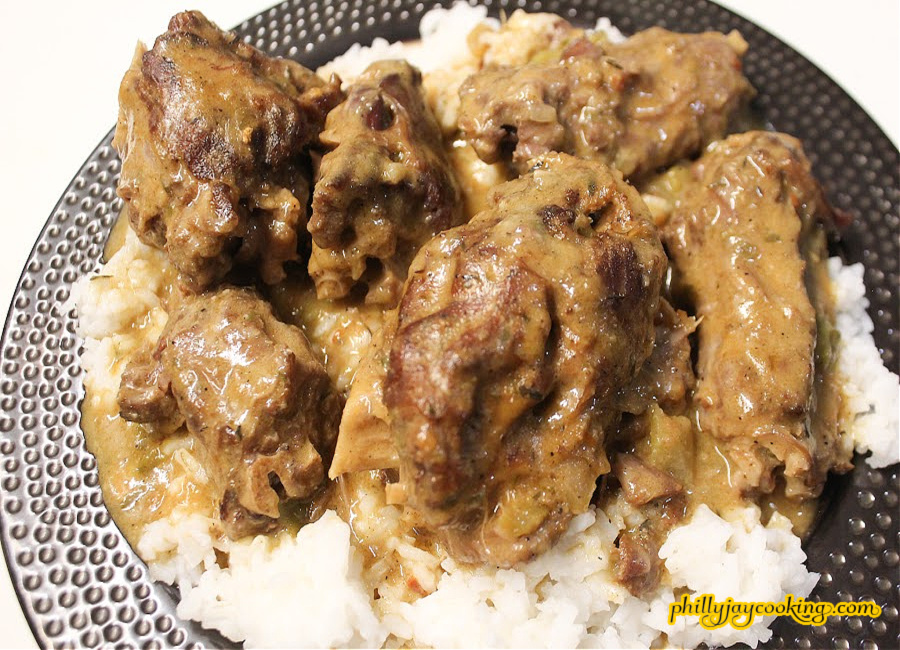
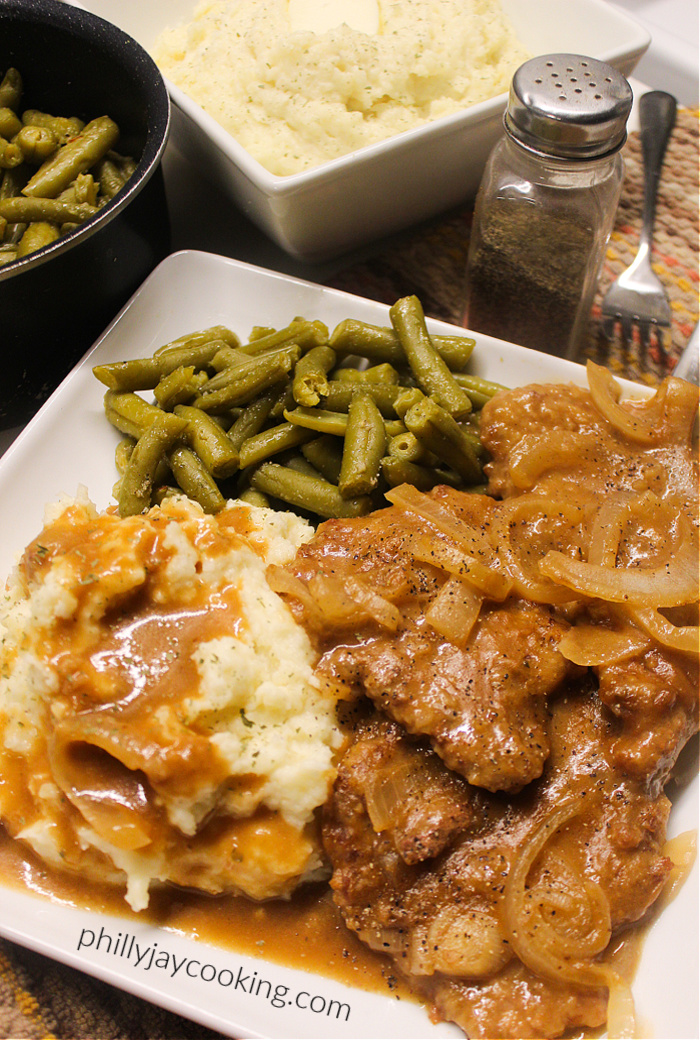
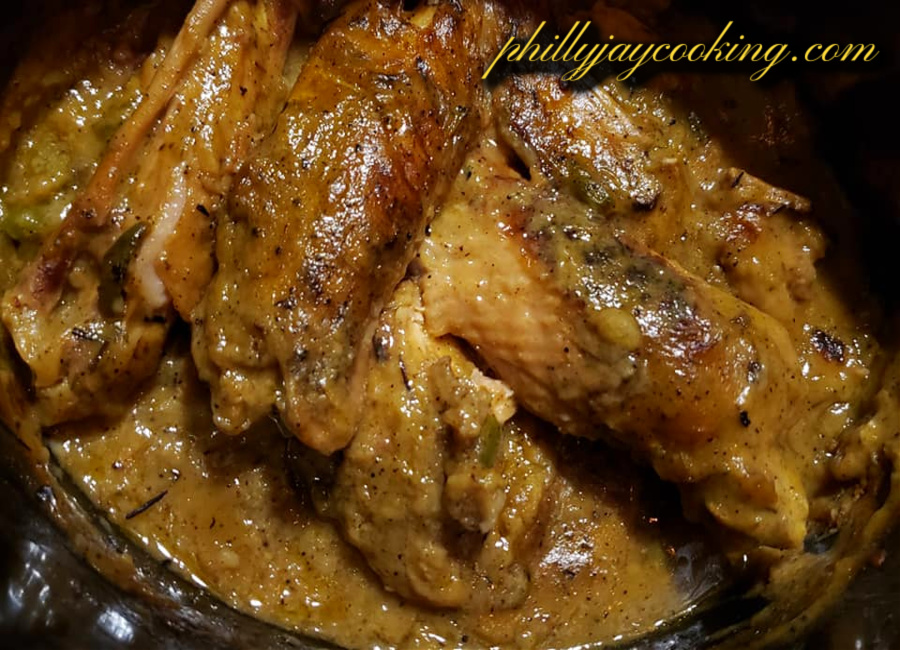
Well, just like many other recipes they’ve all inspired… this is just another one of them. Tender, juicy smothered turkey necks, another Southern classic that my family loved. This is the type of dish that’s very popular down south.
Which is where most of our roots stem from. This is a soul food dish that’s not very popular amongst young people of today, but if you grew up with a grandma from the south, you know how good these things are.
Sunday dinner memories
One funny memory I have, and anyone who loves turkey necks, can relate to this; after you pull all the tender meat off the turkey necks, you’ll find yourself sucking the juice from the bone and hearing whistling sounds. Lol!
But you have to watch out for those tiger teeth bones! That’s one thing about turkey necks I didn’t like very much, those sharp teeth-shaped bones, so don’t get too happy while eating them. Lol!
They’re like fish; you have to eat them slowly and cautiously because of the bones. But yea, that whistling sound of us all sucking the juice from the bones was a sign that they’re good and someone made them right.
If you didn’t hear the whistling and sucking of the bone, somebody ain’t do their job right!!! Because when food is good, we suck the meat off the bones; I don’t care if it’s oxtails, turkey, or chicken.

What you need:
- Meat: Turkey Necks
- Vegetables: Onions, Peppers, Celery, Minced Garlic
- Seasonings: Adobo seasoning, Creole seasoning, Garlic powder, Onion powder, Italian seasoning, Thyme, Paprika, Parsley, Crushed Red Pepper Flakes, and Black pepper
- Fats: Olive oil and Butter
for the gravy:
- Water: Liquid is a necessity; you can’t make gravy without liquid.
- Chicken broth: This enhances the flavor of the gravy.
- Apple Cider Vinegar: Adds flavor.
- All-Purpose Flour: Flour serves as the thickening agent, thickening the liquid to create a gravy.
Where to find turkey necks
I live in Philadelphia, and we have a lot of BUTCHER SHOP where they serve fresh meat resting on ice from behind a glass counter. They also have a butcher and scale where they cut and measure the meat.
I’ve found that a lot of supermarkets sell them, and you can find them in a meat aisle of a grocery store, often whole, not uncut, which can only be done at a butcher shop.
How to cut them
You can honestly cut them however you want, but most people like to cut them into medium-sized 4-inch pieces, and here are a few reasons why I like to cut them this size at the butcher shop.
- Medium-sized turkey necks: 4-inch cut turkey necks are not only easier to manage, but they are plentiful as there are more to serve.
- Long uncut turkey necks: If you keep them long, you will definitely need a very big pot to cook them in or you could bake them in the oven.
Slurry vs Roux
Slurry: So when it comes to the gravy, you have a few options. Those of you who have followed me for a while know that I love creating gravy using the slurry method, which is to combine a thickener like flour or cornstarch with water or broth.
- Slurry pros: It’s simply very easy! You combine a liquid and thickener and add it to a sauce gravy or stew, which thickens into gravy as it cooks.
- Slurry cons: I wouldn’t call this a con necessary, but you can’t always get the perfect color you want. You sometimes have to use a gravy master or bouquet to do this, but nothing is better than a roux to get the perfect gravy color.
Roux (pronounced ROO): Creating gravy using the roux method is made with oil over medium to high heat, with flour that you stir slowly into the oil until it reaches a desired color. Then, a liquid, water, or broth is added, and you stir it until it thickens into gravy.
- Roux pros: You have more control over the outcome and can better customize the gravy’s consistency and color.
- Roux cons: It can be time-consuming sometimes, and it just isn’t as easy as making gravy using the slurry method.

How To Make Smothered Turkey Necks
- Chop vegetables into small pieces.
- Place turkey necks into a large mixing bowl and season with every seasoning except for the red crushed peppers and parsley flakes.

- Place a large pot over medium-high heat.
- Add in the butter, 1 tbs of oil, the vegetables, and minced garlic, and saute for 4 minutes, then remove and set aside.

- Add in another 2 tbs of olive oil and the turkey necks and sear for 12 minutes.
- Create a slurry: Meanwhile, in a large bowl, combine the broth, flour, and vinegar until the flour is well dissolved. Use the water to remove the seasonings from the bowl in which you seasoned the turkey necks.

- Reduce the heat to medium and add the sautéed vegetables back to the pot.

- Sprinkle in the red crushed pepper and parsley flakes.
- Pour in the slurry.
- Cover with a lid, leaving a crack on the side, and cook for 2 hours, stirring periodically.

How To Slow Cook Smothered Turkey Necks
- Preheat your slow cooker to high or low, depending on how long you’re cooking them.
If you’re cooking them while away for long, set them to low heat and cook for 8 hours.
If you’re doing a quicker cook, set it to high heat and cook for 4 hours. - Chop up the vegetables.
- Season the turkey necks.
- Create a slurry by combining the gravy ingredients.
Use less liquid, about 1 cup of water and 1 cup of broth. - Add everything to the crock pot.
- Cook on high heat for 4 hrs or on low heat for 8 hours.
Stir gravy well a little before it’s done.
Tips for best results:
- Stir periodically: Make sure to stir periodically because turkey necks have a tendency to stick to the bottom of the pot.
- Use a nonstick pan: Also, make sure to use a nonstick pot if you can. This will also prevent the turkey necks from badly sticking, especially during the last 30 minutes of cooking.
- Slow cooker tips: Stir everything well before covering with the lid and sit on a counter or table away from paper, towels, or anything that may cause a fire.
What to serve with smothered turkey necks
- The BEST Smooth Creamy Garlic Mashed Potatoes
- World’s BEST Moist Southern Cornbread Recipe
- Southern-Style Green Beans Recipe
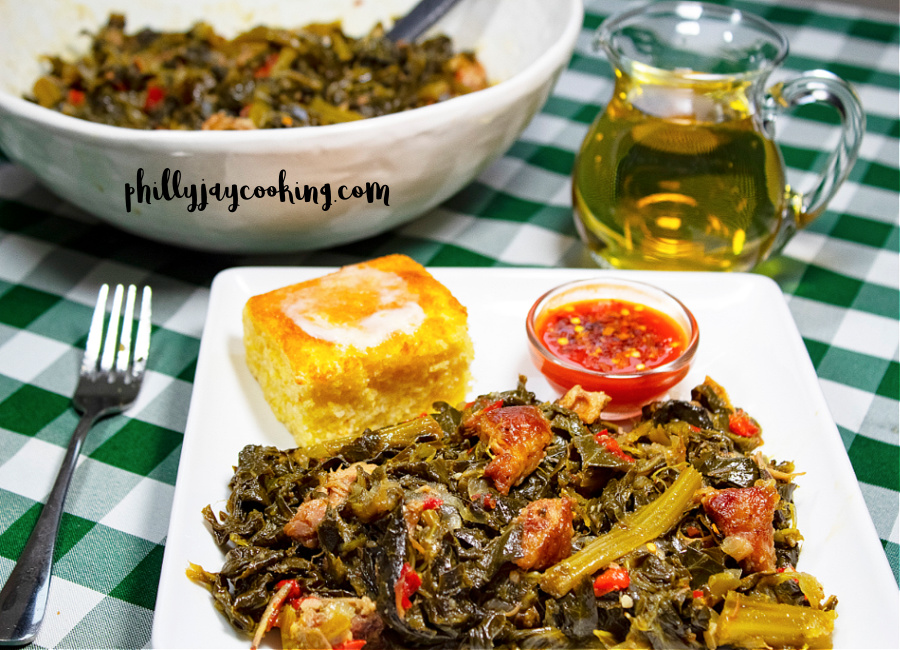
- World’s Best Southern Collard Greens Recipe
Storage and reheating
- How do you store turkey necks? Just place them in a bowl, like a Tupperware bowl, and make sure they’re tightly sealed with plastic wrap, aluminum foil, or a lid then place them in the refrigerator.
- Can you freeze turkey necks? Absolutely! I would place them in a ziploc bag, make sure it’s zipped, and sit them in the freezer. They can stay fresh for up to 6-7 months.
- How to reheat smothered turkey necks in a pot? You just put them in a pot, place them over medium heat, and let them simmer until warm, about 15-20 minutes. Stir periodically.
- How to reheat smothered turkey necks in a microwave? Just place them in a microwave proof dish, and heat them up for 3 minutes. Toss and turn them half way through.
Frequently Asked Questions
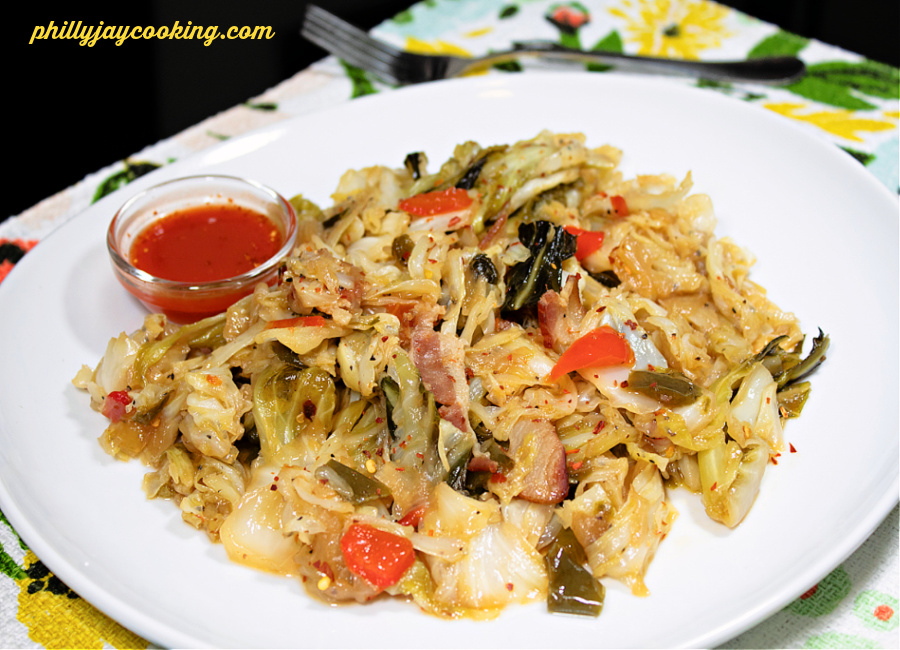
- Can you use smoked turkey necks? Yes, but the flavor will be different, and I prefer using smoked turkey necks to season vegetables like collard greens, cabbage, etc
- How long do they last? If tightly sealed and stored in a refrigerator, 4 to 5 days.

More Soul food Recipes You Might Like
- Baked Smothered Smoked Turkey Tails Recipe
- McCloud’s Baked Smothered Pork Chops
- McCloud’s Southern Smothered Beef Short Ribs
- The BEST New Year’s Eve Pig’s Feet Recipe
- The Best Tender Crispy Southern Fried Turkey Wings
Equipment:
- Large pot: Use a large pot because you’ll be making a lot of turkey necks.
- Mixing bowl: You can use a mixing bowl or big bowl to soak and clean the turkey necks and season them.
- Big spoon: Use a big spoon to stir the turkey necks as they cook and serve them and the gravy once they’re done.
- Measuring spoons: Get some measuring spoons to measure the seasonings accurately.
- Measuring cups: Have a big measuring cup on hand to measure the broth.
Alright now… hope yall enjoy this recipe as much as I do. Now gonna talk y’all to death! Follow the recipe to a T and leave a comment below, letting us know how you like it.
Also, make sure you subscribe so you get notified every time I post a new recipe so you don’t miss out on any deliciousness! Follow me on social media. My handles are Facebook, Twitter, Pinterest, Instagram, and YouTube.
Enjoy, later
PBJ~
Print
The Best Smothered Turkey Necks Recipe
- Prep Time: 30 Mins
- Cook Time: 2 hrs
- Total Time: 2 Hr 30 Mins
- Yield: 8
- Category: Soul Food
- Method: American
- Cuisine: Soul Food
Description
Tender, flavorful, smothered turkey necks drenched in a savory, hearty finger-licking gravy.
Ingredients
- 4 Lbs Turkey Necks
- 3/4 Cup Onions, chopped
- 1/4 Cup Green Peppers, chopped
- 1/4 Cup Celery, chopped
- 2 Tsps Minced Garlic
- 3 Tbs Olive Oil
- 1 Tbs Butter
- 1 Tbs Creole Seasoning
- 1 Tbs Adobo
- 2 Tsps Garlic powder
- 2 Tsps Onion powder
- 2 Tsps Italian seasoning
- 2 Tsps Paprika
- 1 Tsp Parsley Flakes
- 1 Tsp Red crushed Pepper Flakes
- 1 Tsp Black Pepper
- 1/2 Tsp Thyme
Gravy Ingredients
- 1 Qt Chicken or turkey broth
- 1 Qt Water
- 5 Tbs All Purpose Flour
- 1/3 Cup Apple Cider Vinegar
Instructions
- Chop the vegetables into small pieces.
- Place turkey necks into a large mixing bowl and season with every seasoning except for the red crushed peppers and parsley flakes.
- Place a large pot over medium-high heat.
- Add in the butter, 1 tbs of oil, the vegetables, and minced garlic, and saute for 4 minutes, then remove and set aside.
- Add in another 2 tbs of olive oil and the turkey necks and sear for 12 minutes.
- Create a slurry: Meanwhile, in a large bowl, combine the broth, flour, and vinegar until the flour is well dissolved. Use the water to remove the seasonings from the bowl in which you seasoned the turkey necks.
- Reduce the heat to medium and add the sauteed vegetables back to the pot.
- Sprinkle in the red crushed pepper and parsley flakes.
- Pour in the slurry.
- Cover with a lid, leaving a crack on the side, and cook for 2 hours, stirring periodically
Notes
- If you seasoned the turkey necks and made the slurry in separate bowls, use water to get the seasoning out of the bowl.
- Make sure to stir periodically so the turkey necks and gravy dont stick and burn.

Join My Patreon!
Get exclusive access to content you won’t find anywhere else! When you become a member, you’re not just supporting the channel – you’re becoming part of the family.
Videos
Scenes
To Recipes
Memberships
Help keep the recipes coming!
Your support helps me create more delicious soul food recipes, fun videos, and memories we can all enjoy together.
BECOME A MEMBER ›


I cooked these and everybody loved it
As a Philly girl myself this recipe was perfect and they came out like my grandma made them. Amazing recipe followed to a T!
Thanks for trying and following to a T. Happy you enjoyed them.
Could you do this with pork neck bones as well?
Yes, this recipe works for pork necks as well.
My first time cooking turkey necks I must tell you your recipe they turned out GREAT……..
Whoooo! As a turkey neck lover since childhood I know exactly what you’re talking about (lol). You got to suck that collagen from the center of the bone to really get the full flavor effect (if there is such a thing). Carefully of course. As a child I got a few tongue punctures from going to fast and aggressively. I can’t wait to try this one. Up to now I’ve only did necks with greens, beans, potatoes, and noodles.
Yep, haha! You got to try it… you’ll love it.